Two-way Speaker Telephone Téléphone mains-libres avec ... 505 user guide (1,274KB).pdf · 7...
52
505 Two-way Speaker Telephone Téléphone mains-libres avec présentation du numéro Telefon mit Freisprecheinrichtung Telefono con vivavoce a due vie Telefon z funkcją głośnomówiącą English French German Italian Polish User guide Manuel d'utilisation Bedienungsanleitung Istruzioni per l’uso Instrukcja obsługi
Transcript of Two-way Speaker Telephone Téléphone mains-libres avec ... 505 user guide (1,274KB).pdf · 7...
505Two-way Speaker Telephone
Téléphone mains-libresavec présentation du numéro
Telefon mit FreisprecheinrichtungTelefono con vivavoce a due vie
Telefon z funkcją głośnomówiącą
EnglishFrenchGermanItalianPolish
User guideManuel d'utilisationBedienungsanleitungIstruzioni per l’usoInstrukcja obsługi
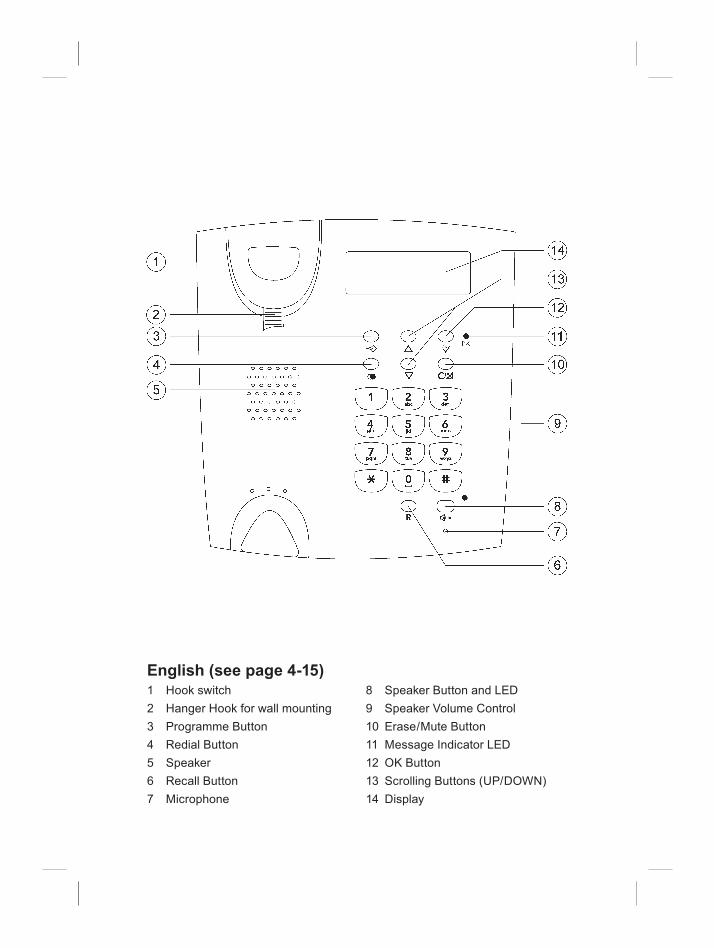
1 Hook switch2 Hanger Hook for wall mounting3 Programme Button4 Redial Button5 Speaker6 Recall Button7 Microphone
8 Speaker Button and LED 9 Speaker Volume Control 10 Erase/Mute Button11 Message Indicator LED12 OK Button13 Scrolling Buttons (UP/DOWN)14 Display
English (see page 4-15)
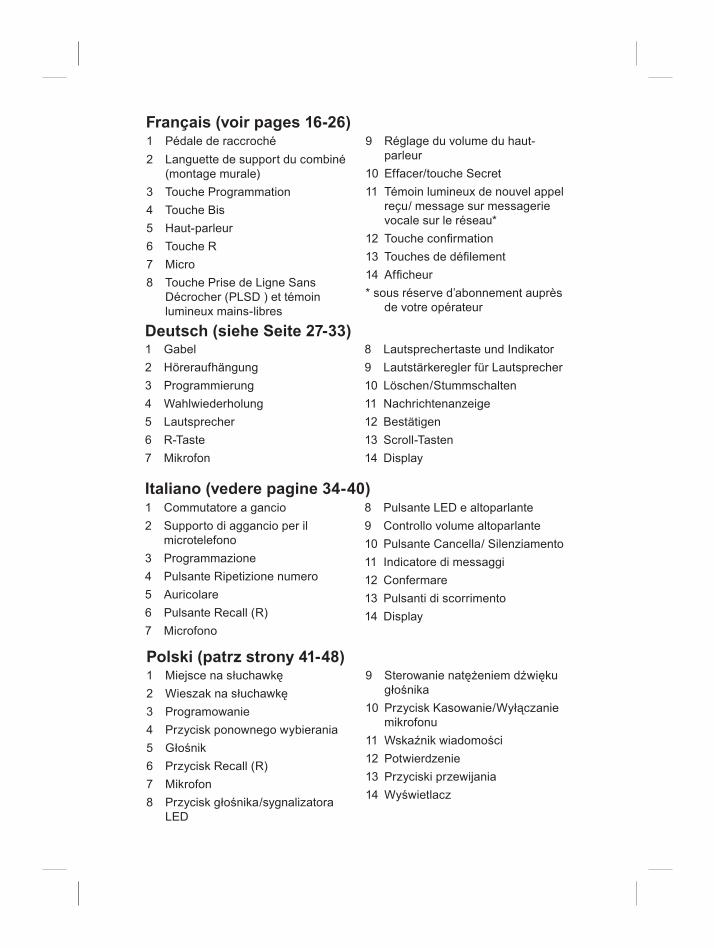
Français (voir pages 16-26)1 Pédale de raccroché2 Languette de support du combiné
(montage murale)3 Touche Programmation4 Touche Bis5 Haut-parleur6 Touche R7 Micro8 Touche Prise de Ligne Sans
Décrocher (PLSD ) et témoin lumineux mains-libres
9 Réglage du volume du haut-parleur
10 Effacer/touche Secret11 Témoin lumineux de nouvel appel
reçu/ message sur messagerie vocale sur le réseau*
12 Touche conrmation13 Touches de délement14 Afcheur* sous réserve d’abonnement auprès
de votre opérateur
Deutsch (siehe Seite 27-33)1 Gabel2 Höreraufhängung3 Programmierung4 Wahlwiederholung5 Lautsprecher6 R-Taste7 Mikrofon
8 Lautsprechertaste und Indikator9 Lautstärkeregler für Lautsprecher10 Löschen/Stummschalten11 Nachrichtenanzeige12 Bestätigen13 Scroll-Tasten14 Display
Italiano (vedere pagine 34-40)1 Commutatore a gancio2 Supporto di aggancio per il
microtelefono3 Programmazione4 Pulsante Ripetizione numero5 Auricolare6 Pulsante Recall (R)7 Microfono
8 Pulsante LED e altoparlante9 Controllo volume altoparlante10 Pulsante Cancella/ Silenziamento11 Indicatore di messaggi12 Confermare13 Pulsanti di scorrimento14 Display
Polski (patrz strony 41-48)1 Miejsce na słuchawkę2 Wieszak na słuchawkę3 Programowanie4 Przycisk ponownego wybierania5 Głośnik6 Przycisk Recall (R)7 Mikrofon8 Przycisk głośnika/sygnalizatora
LED
9 Sterowanie natężeniem dźwięku głośnika
10 Przycisk Kasowanie/Wyłączanie mikrofonu
11 Wskaźnik wiadomości12 Potwierdzenie13 Przyciski przewijania14 Wyświetlacz
English
4 www.doro.com
Installation
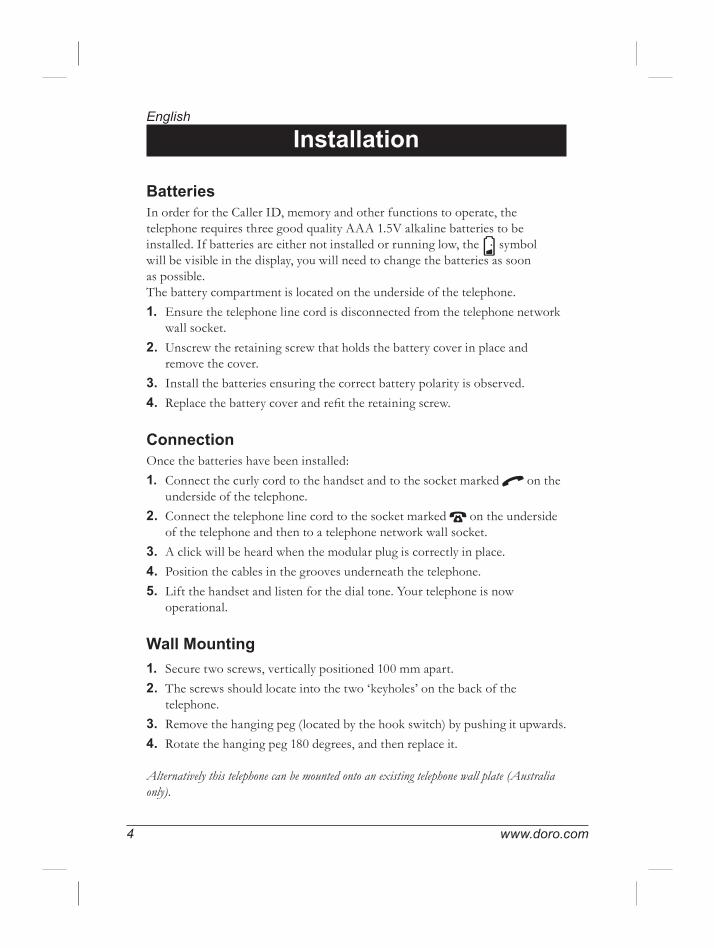
BatteriesIn order for the Caller ID, memory and other functions to operate, the telephone requires three good quality AAA 1.5V alkaline batteries to be installed. If batteries are either not installed or running low, the symbol will be visible in the display, you will need to change the batteries as soon as possible.The battery compartment is located on the underside of the telephone.1. Ensure the telephone line cord is disconnected from the telephone network
wall socket.2. Unscrew the retaining screw that holds the battery cover in place and
remove the cover. 3. Install the batteries ensuring the correct battery polarity is observed.4. Replace the battery cover and refit the retaining screw.
ConnectionOnce the batteries have been installed:1. Connect the curly cord to the handset and to the socket marked q on the
underside of the telephone.2. Connect the telephone line cord to the socket marked T on the underside
of the telephone and then to a telephone network wall socket.3. A click will be heard when the modular plug is correctly in place.4. Position the cables in the grooves underneath the telephone.5. Lift the handset and listen for the dial tone. Your telephone is now
operational.
Wall Mounting1. Secure two screws, vertically positioned 100 mm apart.2. The screws should locate into the two ‘keyholes’ on the back of the
telephone.3. Remove the hanging peg (located by the hook switch) by pushing it upwards.4. Rotate the hanging peg 180 degrees, and then replace it.
Alternatively this telephone can be mounted onto an existing telephone wall plate (Australia only).
English
www.doro.com 5
Installation
Setting the Time and Date1. Press and hold P until Setup is shown.2. Press P again. Hour will flash.
3. Scroll to the desired setting using v/V.4. Press 0. Minutes will flash.
5. Scroll to the desired setting using v/V.6. Press 0. Date will flash.
7. Scroll to the desired setting using v/V. 8. Press 0. Month will flash.
9. Scroll to the desired setting using v/V.10. Press P twice to save your settings.
English
6 www.doro.com
Operation
Speaker Function1. Press s. The speaker will be activated and the LED indicator will
illuminate.2. Dial the required telephone number. Adjust the volume control on the side
of the telephone.3. Speak towards the microphone on the front edge of the telephone.4. Press s to terminate the call.
Please note!During the course of a telephone conversation, you can switch from hands free speaker to handset mode at any time by picking up the handset. Replace the handset to terminate the call.Please remember that in hands free speaker mode, only one person at a time can talk. The switch over between speaker and microphone is automatic and dependant on the sound level on the incoming line and the microphone respectively. It is therefore essential that no loud noise in the immediate surroundings of the telephone, as this will disrupt the speaker function.
Hold ButtonPress z to place an incoming call on hold.The call can be resumed by pressing z again.The display will flash and the handset microphone will be inoperative for as long as the function is active.
Redial ButtonThe five most recently dialled numbers can easily be redialled using r.1. Press r repeatedly, to scroll through the numbers.2. Press 0, the selected number will now be dialled.During the course of a telephone conversation, you can switch from hands free speaker to handset mode at any time by picking up the handset.
English
www.doro.com 7
Operation
MemoryThis telephone has 10 indirect memories.When a number is stored in a memory location, you need to press only two buttons to make the call. The memories are stored on the keypad digits 0-9.
Storing Memories1. Press and hold P until Setup is shown.2. Enter a memory location 0-9 on the telephone keypad.3. Enter the desired telephone number (up to 22 digits). Use C to erase or
change an entry.4. Press 0. The number is now stored.5. Enter another memory location to continue or press C to return to standby
mode.
Memory Dialling1. Lift the handset (or press the s button) and wait for a dialling tone.2. Press P.3. Select a memory location by pressing the relevant keypad number, 0-9.
Press r. If you want a pause in the telephone number.In case of a number change, store the new number in the location of the old one following the procedure above.
Volume ControlThe handset volume may be adjusted during a call using the switch located on the handset.The hands free speaker volume may be adjusted during a call using the switch located on the right hand side of the base unit.
RingerThe Ringer volume can be set to three modes – high, low or off – using the switch located on the underside of the telephone.
English
8 www.doro.com
Operation
TimerApproximately 5 seconds after dialling a timer will be shown on the display. The timer helps you keep track of how long the call lasts.
Optional Network ServicesAccess to additional network services can be gained by using the recall button R, * and # keys. Contact your network operator for more information.Press the recall button R followed by the extension number to transfer calls when connected to a PBX (TBR only).
English
www.doro.com 9
Caller Identication
Explanation of Caller ID (CID).Caller ID allows you to see who is calling before you answer a call, and to see who has called in your absence. If the number received is stored in the phone book, that corresponding entry is shown as well.Numbers received are logged and can easily be retrieved for review or dialling. The call log will store up to 40 telephone numbers. New calls are indicated by a flashing message indicator light. The display will also indicate the number of calls both new and total received. The indicator will stop flashing as soon as the new number(s) are reviewed.When the log is full, the oldest number will be deleted automatically, as a new call is logged.
Please note!In order for numbers to be shown, the Caller ID service must be provided by your network operator and a current subscription in place. Contact your operator for more information.
Dialling a number from CID.
1. Scroll to the desired telephone number using v/V.2. Pick up the handset and press 0, the displayed telephone number will now
be dialled.
During the course of a conversation, you can switch from the hands free speaker to handset mode at any time by picking up the handset.
MessagesApart from telephone numbers, the display can show:
Unavailable It is an International call or a call from a PBX (no information received)
Private The call is comes from a blocked number or a PBX.Repeat Several calls have been received from this particular phone
number.5 Message indication (sent from your network operator). In
addition, the 5 indicator flashes two times in sequence.
Please note!The exact text message may differ from those shown above dependent on the text message supplied by your telephone exchange.
English
10 www.doro.com
Caller IdenticationErasing Individual Numbers from CID
1. Scroll to the telephone number you wish to erase v/V.2. Press C. The displayed number will begin flashing.3. Press C again to confirm.
Erasing ALL numbers from CID
1. Scroll to the any telephone number in the CID list v/V.2. Press and hold C until the display shows -00- CALLS .
English
www.doro.com 11
Least Cost Routing
Using Least Cost Routing (LCR)This function will automatically select the telephone network operator of choice. The telephone can be set up to add digits and/or replace certain digits in telephone numbers. To choose a certain network operator, you would normally dial a prefix code before the actual telephone number.
If you have chosen a certain LCR operator for international calls, in order to dial your calls using their service you must dial a prefix code before the country code, for example 9502. You can program the LCR function so whenever you dial a number beginning with 00, the phone will automatically change this to 950200. For example: 0046462805000 would automatically be dialled 95020046462805000.
Please note!In order to place your call with a certain operator you must be a registered subscriber.Only one LCR setting can be active at a time.
Setting Up LCR1. Press and hold P until Setup is shown, and then release.2. Press P twice. The display will show Lcr and on (active) or oFF (off).
3. Scroll to the desired function using v/V.4. Press 0. The left side of the display will flash.5. Enter the dialling sequence to be replaced (up to four digits, e. g. 00).
Use C to erase or change an entry.6. If you have entered less than four digits, press 0 to move on. The right side
of the display will flash.7. Enter the new dialling sequence (up to eight digits, e. g. 950200).
If there’s already a number entered here, it can be erased using C.8. Confirm the programmed settings by pressing 0.

English
12 www.doro.com
Least Cost RoutingAutomatic network prex using economy routing (LCR)The LCR function can be used also to insert numbers in front of all phone numbers.1. Press and hold P until Setup is shown, and then release.2. Press P twice. The display will show Lcr and on (active) or oFF (off).
3. Scroll to the desired function using v/V.4. Press 0. The left side of the display will flash.5. The left side of the display must be empty.
If there’s already a number entered here, erase it using C.6. If you have entered less than four digits, press 0 to move on. The right side
of the display will flash.7. Enter the new dialling sequence (up to eight digits, e. g. 950200).
If there’s already a number entered here, it can be erased using C.8. Confirm the programmed settings by pressing 0.
English
www.doro.com 13
Other
Troubleshooting
Telephone does not work- Check that the telephone cord is undamaged and properly plugged in.- Disconnect any additional equipment that may be connected. If the problem
is resolved, the fault is with the other equipment.- Test the equipment on a known working line (e. g. at the neighbour’s). If the
product works then the fault is with the line.
No number is shown when a call is received- In order for this feature to function, you must subscribe to the Caller
Identification service from your network provider.- If a message shows on the display, the call may be an international call (no
data received), or from a private or blocked number.- It may not be possible to receive CID information if the phone operates in
a PBX system.
If the telephone still does not work, contact the place of purchase for service.Don’t forget the receipt or copy of the invoice.
Recall Time The telephones recall timing is preset to, 100 milliseconds (UK and AU) and 600 milliseconds (NZ).
Guarantee (UK)This product is guaranteed for a period of 12 months from the date of purchase. Proof of purchase is required for any service or support required during the guarantee period.This guarantee shall not apply to a fault caused by an accident or any similar incident or damage, liquid ingress, negligence, abnormal usage or any other circumstances on the purchaser’s part. Furthermore, this guarantee shall not apply to a fault caused by a thunderstorm or any other voltage fluctuations.This guarantee does not in any way affect your statutory rights. (As a matter of precaution, we recommend disconnecting the telephone during a thunderstorm.)
English
14 www.doro.com
Other
Guarantee (Australia and New Zealand)This product is guaranteed for a period of 12 months from the date of purchase.Should you experience difficulties with the product, please contact us for assistance. If the product is then found to be faulty you will be asked to return it directly to us with a copy of the purchase receipt.This guarantee shall not apply to a fault caused by an accident or a similar incident or damage, liquid ingress negligence, abnormal usage or any other circumstances on the purchaser’s part. Furthermore, this guarantee shall not apply to a fault caused by a thunderstorm or lightning, excessive or any other voltage fluctuations or faults on the telephone line. (As a matter of precaution, we recommend disconnecting the telephone during a thunderstorm).This guarantee does not affect your statutory rights.
Technical If you cannot resolve the fault using the faultfinder section, technical support is available on the Premium Rate Number: 0906 302 0114. Calls cost 50 pence per minute (prices correct at the time of going to press), and is operational between 9AM - 5PM Monday-Friday excluding Bank Holidays. Alternatively, E-mail on: [email protected] You can contact us in writing: Consumer Support Group, Doro UK Ltd., 22 Walkers Road, North Moons Moat, Redditch, Worcestershire, B98 9HE, (regarding any Spares or Technical query), orTelephoning (Spares only): 01527 584377 Web site: www.doro-uk.com
Australia and New ZealandIf you believe this product is malfunctioning, please refer to the relevant section and/or consult the troubleshooting guide in this manual to ensure that you have followed the instructions carefully. As an alternative you can visit our web site for FAQ’s or send an e-mail for a prompt reply.
AUSTRALIA NEW ZEALANDDORO Australia Pty Ltd Atlas Gentech (NZ) LimitedPO Box 6760 Private Bag 14927Baulkham Hills BC NSW 2153 PanmureAustralia Auckland New Zealand
English
www.doro.com 15
OtherConsumer Support Consumer SupportPh: (02) 8853 8444 Ph: 0900 50-025 (Toll Call)Fax: (02) 8853-8489 Fax: (09) 574-2722Email: [email protected] Email: [email protected] site: www.doro.com.au
Technical information
REN (RN for New Zealand)The REN (Ringer Equivalence Number) or (RN) is of significance only if you wish to connect more than 1 telephone to your telephone line. A standard telephone line has a maximum REN capacity of 3 (RN of 5). It is possible to connect 3 devices with a REN of 1 (RN of 1) with no degradation to the product’s performance. Exceeding this limit may cause the volume of the ringer in any phone to decrease or not ring at all.
Notes for operation in New Zealand
ALL PRODUCTSThe grant of a Telepermit for any item of terminal equipment indicates only that Telecom has accepted that the item complies with the minimum conditions for connection to its network. It indicates no endorsement of the product by Telecom, nor does it provide any sort of warranty. Above all, it provides no assurance that any item will work correctly in all respects with another item of Telepermitted equipment of a different make or model, nor does it imply that any product is compatible with all of Telecom’s network services.This equipment shall not be set to make automatic calls to the Telecom “111“ Emergency Service. This equipment may not provide for the effective hand-over of a call to another device connected to the same line.This equipment should not be used under any circumstances that may constitute a nuisance to other Telecom Customers.
CND PRODUCTSIf a charge for local calls is unacceptable, the “DIAL“ button should NOT be used for local calls. Only the 7 digits of the local number should be dialled from your telephone. DO NOT dial the area code digit or the “0“ prefix.
Français
16 www.doro.com
Installation
Raccordement1. Installer les piles. Voir ci-dessous.2. Reliez le câble téléphonique fourni à la prise de téléphone et à la fiche au
téléphone marquée T. 3. Reliez le cordon spiralé à la prise du combiné et dans la fiche du téléphone
marquée q.4. Placer les câbles dans les rainures situées au dos du téléphone.5. Prenez le combiné: vous devez entendre la tonalité.
PilesPour que la présentation du numéro, la mémoire etc. puissent fonctionner, l’appareil a besoin de trois piles 1,5V du type AAA. Le symbole s’allume lorsque les piles doivent être changées.Changez les piles le plus tôt possible! Utilisez uniquement des piles de haute qualité.1. Débranchez le téléphone.2. Dévissez la vis qui tient la trappe des piles et enlevez-la.3. Insérez les piles selon les marques des pôles positif et négatif.4. Remettez en place la trappe des piles et la vis.
Installation murale1. Montez deux vis espacées verticalement de 83 mm.2. Insérez les têtes des vis dans les trous, et faites glissez le téléphone vers le
bas pour le mettre en place.3. Enlever la languette de support du combiné, située sous la pédale de
raccroché, en la tirant.4. Tournez la languette de support du combiné d’un demi tour et remettez-la
en place.
Français
www.doro.com 17
Installation
Régler la date et l’heure1. Appuyez sur P jusqu’à ce que s’affiche.
2. Appuyez à nouveau sur P, l’heure clignote.3. Régler l’heure actuelle par v/V.4. Appuyez sur 0.5. Répétez les étapes 3. et 4. pour régler minutes, jour et mois.6. Appuyez deux fois sur P pour enregistrer le réglage.
Français
18 www.doro.com
Utilisation
Fonction Mains-libres1. Appuyez sur s. La fonction mains-libres est enclenchée et le témoin
lumineux en regard de la touche s’allume.2. Composez le numéro de téléphone souhaité. Réglez éventuellement le
volume à l’aide du curseur de réglage du volume situé sur le côté du téléphone.
3. Parlez face au micro situé à l’avant du téléphone.4. Appuyez sur s pour terminer la communication.Si vous le souhaitez vous pouvez alterner entre la position combiné et la position mains-libres en cours de communication.
Remarque!Notez qu’en position mains-libres les deux correspondants ne peuvent pas parler simultanément, mais uniquement un à la fois. L’alternance entre celui qui parle et celui qui écoute se fait automatiquement, et elle est gérée par le son de la pièce où est placé le téléphone (votre discours) et le son de la ligne téléphonique (l’autre correspondant). C’est pourquoi il est important qu’il n’y ait pas de dérangement de la fonction mains-libres dans l’entourage du téléphone, comme par exemple de la musique à haut volume.
Touche secretLe micro peut être coupé en cours de communication en appuyant sur la touche z.Appuyez à nouveau sur la touche secret pour ré-activer le micro.
L’affichage clignote tant que la fonction est active.
Touche BisLa touche r permet de rappeler aisément les cinq derniers numéros que vous avez composés.1. Appuyez plusieurs fois sur r pour faire défiler ces numéros.2. Appuyez sur 0 pour composer le numéro choisi.Si vous le souhaitez vous pouvez alterner la position combiné et la position mains-libres en cours de communication.
Français
www.doro.com 19
Utilisation
RépertoireCe téléphone possède 10 numéros enregistrés en mémoire abrégée. Une fois le numéro de téléphone enregistré sur une de ces plages, vous le composez en pressant simplement deux touches. Les plages en mémoire abrégée sont numérotées de 0 à 9.
Mettre un numéro en mémoire abrégée1. Appuyez sur P jusqu’à ce que s’affiche.2. Choisissez une des plage de mise en mémoire 0-9.3. Composez le numéro de téléphone (max. 22 chiffres). Utilisez C pour effacer
ou corriger.4. Appuyez sur 0 pour enregistrer.5. Enregistrez encore un numéro ou appuyez sur C pour repasser en mode
repos.
Appeler un numéro enregistré en mémoire abrégée1. Prenez le combiné (ou appuyez sur s) et attendez la tonalité.2. Appuyez sur P.
3. Choisissez une plage en mémoire abrégée numérotée de 0 à 9.
Insérez une pause en appuyant sur r .
Réglage du volume du combinéLe volume d’écoute peut être réglé par le curseur situé sur le combiné.
Mélodie de sonnerieLe téléphone dispose d’un volume de sonnerie réglable - niveaux haut, bas ou coupure – à régler par le curseur situé au dos du téléphone.
Français
20 www.doro.com
Utilisation
Chronométrage des appelsLorsque la communication est établie, un chronomètre s’affiche. Ce chronomètre vous permet de vérifier la durée de l’appel.
Services réseaux optionnelsLes touches *, # et R vous permettront d’accéder à des services additionnels proposés par des opérateurs téléphoniques (signal d’appel,…).Pour toute information, adressez-vous directement au fabricant du PABX ou à votre opérateur téléphonique.
Français
www.doro.com 21
Présentation du numéro*Que signie Présentation du Numéro*?La présentation du numéro de l’appelant vous permet de voir qui vous appelle avant de répondre, et de vérifier qui vous a appelé en votre absence.Les appels entrants sont enregistrés par ordre chronologique, l’ordre est affiché en bas à gauche. Le voyant lumineux rouge clignote pour vous signaler que vous avez reçu un nouvel appel.Le journal enregistre jusqu’à 40 numéros de téléphone, tous les appels reçus sont enregistrés.Lorsque le journal atteint sa capacité maximum, les numéros les plus anciens sont effacés automatiquement au fur et à mesure des nouveaux appels.
Remarque!Pour que la Présentation du Numéro puisse fonctionner il faut s’abonner à ce service auprès votre opérateur téléphonique. Pour toute information, adressez-vous directement au fabricant du PABX ou à votre opérateur téléphonique.
Consulter et appeler à partir du journal des appelants (JAP).1. Appuyez sur v ou V pour faire défiler les numéros enregistrés.2. Appuyez sur 0 pour appeler ou attendez pour retourner au mode repos.Si vous le souhaitez, vous pouvez alterner entre la position combiné et la position mains-libres en cours de communication.
MessagesEn plus des numéros de téléphone, l’afficheur peut indiquer :
Il s’agit d’un appel international ou d’un appel provenant d’un PABX (aucune information reçue)
L’appel provient d’un numéro masqué ou inaccessible. Appel répété du même numéro.
5 Signale un message en attente sur votre messagerie vocale sur le réseau; cette information n’est disponible que si votre réseau supporte cette fonction, et que vous avez souscrit un abonnement..
Français
22 www.doro.com
Présentation du numéroEffacer un numéro du Journal des Appelants.1. Atteignez le numéro voulu à l’aide des touches v/V.2. Appuyez sur c. L’afficheur clignote.3. Appuyez à nouveau sur c, le numéro est effacé.
Effacer tous les numéros consultés (numéros anciens).1. Atteignez la position voulue à l’aide des touches v/V.2. Appuyez sur c jusqu’à ce que -00- CALLS s’affiche. Tous les numéros
enregistrés dans le Journal des appelants sont effacés
Français
www.doro.com 23
Pré-sélection de l’opérateur (LCR)La pré-sélection de l’opérateur (LCR)Cette fonction permet de sélectionner automatiquement le réseau téléphonique de l’opérateur de votre choix. Vous pouvez configurer votre téléphone de façon à ajouter certains chiffres aux numéros de téléphone et/ou en remplacer d’autres. En général, pour sélectionner le réseau téléphonique d’un opérateur donné, vous ajoutez un préfixe au numéro de votre correspondant.
Exemple:Vous avez choisi un opérateur donné pour vos appels vers l’étranger. Pour que votre communication passe par cet opérateur, vous composez par exemple le 9502 avant le code du pays. Vous pouvez régler la fonction de pré-sélection de l’opérateur de façon à ce que tous les numéros commençant par 00 deviennent automatiquement 950200. Par exemple: le numéro 0046462805000 devient automatiquement 950200 46 46 2805000.
Remarque!Pour faire passer vos communications par un opérateur donné, vous devez être abonné.Vous ne pouvez activer la pré-sélection que d’un seul opérateur.
Congurer la pré-sélection de l’opérateur.1. Appuyez sur P jusqu’à ce que s’affiche.2. Appuyez deux fois sur P. Lcr et on (activé) ou oFF (désactivé) s’affichent.3. Atteignez le réglage voulu à l’aide des touches v/V.4. Appuyez sur 0. Le côté gauche de l’afficheur clignote.5. Entrez le groupe de chiffres à remplacer (jusqu’à 4 chiffres, 00 par exemple).
Utilisez C pour effacer ou corriger.6. Si vous avez entré moins que 4 chiffres, appuyez sur 0 pour avancer. Le côté
droit de l’afficheur clignote.7. Entrez le groupe de chiffres à ajouter (jusqu’à 8 chiffres, 950200
par exemple).S’il y a déjà un numéro indiqué à cette place, vous pouvez l’effacer par C.
8. Terminez le réglage avec 0.
Français
24 www.doro.com
Pré-sélection de l’opérateur (LCR)Si vous laissez vide le champ alloué au groupe de chiffres à remplacer (point 5. du paragraphe précédent) le téléphone ajoutera le préfixe (entré au point 7. du paragraphe précédent) à tous vous numéros de téléphone. 1. Effectuer les étapes 1. - 4. selon l’instruction au-dessus.2. Le côté droit de l’afficheur doit être vide.
S’il y a déjà un numéro indiqué à cette place, vous pouvez l’effacer par C.3. Effectuez les étapes 6. - 8. selon l’instruction ci-dessus.
Français
www.doro.com 25
Autres
DépannageVérifiez que le câble téléphonique est en bon état et qu’il est branché correctement. Débranchez tout autre matériel, rallonges et téléphones. Si l’appareil fonctionne alors normalement, la panne est dûe au matériel additionnel.Testez le matériel sur une autre ligne téléphonique (comme celle d’un voisin). Si le matériel fonctionne sur ce raccordement, cela signifie que votre propre raccordement téléphonique est défectueux. Signalez la panne à votre opérateur téléphonique.
Aucun numéro ne s’afche- Pour faire marcher cette fonction correctement, il faut s’abonner au service
de présentation du numéro auprès de votre opérateur.- Si un message est affiché, il signifie qu’aucune information sur le numéro
du correspondant n’a été transmise (numéro international, inaccessible,…) ou que le correspondant a un numéro masqué.
- Il est possible que l’identification du correspondant ne soit transmise si le téléphone fonctionne derrière PABX (veuillez contacter votre installateur).
Si le téléphone ne fonctionne toujours pas, malgré les mesures susmentionnées, veuillez contacter le vendeur.
Français
26 www.doro.com
Autres
Garantie et S.A.V.Cet appareil est garanti un an à partir de sa date d’achat, la facture faisant foi. La réparation dans le cadre de cette garantie sera effectuée gratuitement, pièces et main d’oeuvre.La garantie est valable pour un usage normal de l’appareil tel qu’il est défini dans la notice d’utilisation.Les fournitures utilisées avec l’appareil ne sont pas couvertes par la garantie.Sont exclues de cette garantie les détériorations dues à une cause étrangère à l’appareil.En particulier la garantie ne s’appliquera pas si l’appareil a été endommagé à la suite d’un choc ou d’une chute, d’une fausse manoeuvre, d’un branchement non conforme aux instructions mentionnées dans la notice ou aux prescriptions de l’ART (-Autorité de Régulation des Télécommunications), de l’effet de la foudre, de surtensions électriques ou électrostatiques, d’une protection insuffisante contre l’humidité, la chaleur ou le gel.En cas de panne, adressez-vous au S.A.V. de votre revendeur ou installateur.
Pour la FranceEn tout état de cause, la garantie légale pour vices cachés s’appliquera conformément aux articles 1641 et suivants du Code Civil.Si vous avez des soucis d’utilisation, contactez notre Service d ’Assistance Téléphonique au 08 92 68 90 18 (N ° Audiotel --2 ,21F /mn ).
Deutsch
www.doro.com 27
Installation
Anschliessen1. Batterien anschliessen. Siehe unten.2. Schliessen Sie das Telefonkabel an eine geeignete Telefonsteckdose und an
den Anschluss T am Telefon an. 3. Schliessen Sie das Spiralkabel an den Hörer und an den Anschluss q am
Telefon an.4. Platzieren Sie die Kabel in die Rille an der Unterseite des Telefons.5. Heben Sie den Hörer ab und vergewissern Sie sich, dass ein Freizeichen zu
hören ist.
BatterienDamit die Rufnummeranzeige, der Speicher usw. Funktioniert, benötigen Sie drei 1,5V-Batterien vom Typ AAA. Wenn die Leistung der Batterien nachlässt, erscheint das Symbol .Tauschen Sie die Batterien dann so schnell wie möglich aus! Benutzen Sie nur Batterien von guter Qualität.1. Ziehen Sie das Telefonkabel ab.2. Lösen Sie die Schraube der Batterieklappe und nehmen Sie die Klappe ab.3. Setzen Sie die Batterien, wie auf den Markierungen gezeigt, ein.4. Setzien Sie die Klappe wieder auf und schrauben sie sie fest.
Wandmontage1. Montieren Sie zwei Schrauben waagerecht mit 100mm Abstand.2. Platzieren Sie das Telefon über die Schrauben und drücken sie es herunter.3. Nehmen Sie die Höreraufhängung an der Gabel ab, indem sie diese nach
oben führen.4. Drehen Sie die Aufhängung eine halbe Umdrehung und setzen sie diese
wieder ein.
Datum und Zeit einstellen1. Halten Sie P gedrückt, bis angezeigt wird.2. Drücken Sie nochmals P, die Stunden blinken.3. Blättern Sie mit v/V bis zur gewünschten Einstellung.
4. Drücken Sie 0.5. Schritt 3. und 4. wiederholen um Minute, Tag und Monat einzustellen.6. Drücken Sie zum Speichern zweimal die Taste P.
Deutsch
28 www.doro.com
Bedienung
Lautsprecherfunktion1. Drücken Sie s. Der Lautsprecher wird eingeschaltet und der Indikator in
der Taste leuchtet.2. Wählen Sie die gewünschte Telefonnummer. Stellen Sie die Lautstärke mit
den Reglern an der Seite ein.3. Sprechen Sie in das Mikrofon an der Vorderseite des Telefons.4. Drücken Sie s um das Gespräch zu beenden.Während des Gesprächs können Sie zwischen Hörer und Freisprecheinrichtung wechseln.
Achtung!Sie beenden das Gespräch in dem Sie den Hörer auflegen. Bei eingeschalteter Freisprecheinrichtung können nicht beide Teilnehmer gleichzeitig sprechen. Die Umschaltung geschieht automatisch und ist sprachgesteuert. Solange Sie sprechen, kann also der andere Teilnehmer nur hören und umgekehrt. Achten Sie deshalb darauf, dass in der Umgebung keine lauten Geräusche sind, wie z.B. laute Musik.
MikrofonstummschaltungDas Mikrofon kann während des Gesprächs mit der Taste z abgeschaltet werdenNochmaliges Drücken der Taste aktiviert das Mikrofon wieder.
Das Display blinkt, solange das Mikrofon abgeschaltet ist.
WahlwiederholungMit der Taste r können die letzten 5 eingegebenen Telefonnummern angerufen werden.1. Drücken Sie die Taste r so oft, bis die gewünschte Nummer angezeigt
wird.2. Drücken Sie 0. Die Nummer wird gewählt.Während des Gesprächs können Sie zwischen Hörer und Freisprecheinrichtung wechseln.
Deutsch
www.doro.com 29
Bedienung
SpeicherDas Telefon kann 10 Kurzwahlnummern speichern. Wenn eine Nummer auf einer dieser Tasten gespeichert ist, kann diese mit nur zwei Tasten gewählt werden. Die Kurzwahlnummern sind mit 0-9 nummeriert.
Kurzwahlnummer speichern1. Halten Sie P gedrückt, bis angezeigt wird.2. Wählen Sie den gewünschten Speicherplatz mit den Tasten 0-9.3. Telefonnummer eingeben (max. 22 Zeichen). Löschen oder ändern mit C.4. Speichern mit 0.5. Speichern Sie weitere Nummern oder drücken Sie C um zum Standbymodus
zurück zu gehen.
Anruf mit Kurzwahl1. Hörer abheben (oder drücken Sie s) und warten Sie auf das Freizeichen.2. Drücken Sie die Taste P.3. Wählen Sie die gewünschte Kurzwahlnummer mit den Tasten 0-9.
Wenn Sie eine Pause während der Anwahl möchten, drücken Sie die Taste r .Wenn eine Nummer geändert werden soll, speichern Sie die neue Nummer über der alten Nummer.
HörerlautstärkereglerDie Lautstärke kann mit einem Schalter im Hörer eingestellt werden.
RufsignalDas Rufsignal kann mit dem Umschalter an der Rückseite des Telefons eingestellt werden.
Deutsch
30 www.doro.com
Bedienung
TimerKurz nach Beginn eines Gesprächs wird ein Timer im Display angezeigt. Hier können Sie sehen, wie lange das Gespräch andauert.
Weitere DiensteDieses Telefon kann mit den Tasten R, * und # weitere Dienste ausführen.Welche Dienste zur Verfügung stehen, hängt vom Angebot Ihres Netzbetreibers ab.
Deutsch
www.doro.com 31
RufnummernanzeigeSo funktioniert die RufnummeranzeigeSie können auf dem Display sehen wer anruft, bevor Sie den Anruf annehmen oder sehen wer angerufen hat, wenn Sie nicht zu Hause waren.Die Nummern werden nach Zeit geordnet. Die Ordnungsnummer wird auf dem Display unten links angezeigt.40 Telefonnummern können gespeichert werden. Wenn der Speicher voll ist, ersetzt jeder neue Anruf die älteste Telefonnummer im Speicher.
Achtung!Die Rufnummeranzeige funktioniert nur, wenn dieser Dienst von Ihrer Telefongesellschaft unterstützt wird. Bitte fragen Sie bei Ihrer Telefongesellschaft nach.
Ablesen und anrufen1. Drücken Sie v und V um zwischen den Telefonnummern zu blättern.2. Drücken Sie 0 um die gewünschte Nummer anzurufen oder warten Sie bis
das Telefon in den Standby-Modus geht.Während des Gesprächs können Sie zwischen Hörer und Freisprecheinrichtung
wechseln.
NachrichtenAusser der Telefonnummer kann das Display folgende Informationen anzeigen:
Keine Information vorhanden, z.B. bei Anrufen aus dem Ausland. Geheieme Nummer, Anonym oder Anruf über Vermittlung. Dieser Anrufer hat mehr als einmal angerufen.
5 Nachrichtenanzeige des Netzadministrators. Ausserdem blinkt das Symbol 5.
Telefonnummer löschen1. Blättern Sie mit v oder V bis zur gewünschten Position.2. Drücken Sie c. Die Position blinkt im Display.3. Drücken Sie C nochmals. Die Nummer wird gelöscht.
Alle Telefonnummern löschen1. Blättern Sie bis zur gewünschten Position mit v und V.2. Halten Sie c bis das Display anzeigt: -00- CALLS .
Deutsch
32 www.doro.com
Least Cost RoutingLeast Cost RoutingMit dieser Funktion können Sie automatisch einen anderen Telefonanbieter wählen. Sie können neue Ziffern hinzufügen oder vorhandene Ziffern ersetzen. Um den Anbieter anzuwählen, muss normalerweise ein sog. Prefix eingegeben werden.Beispiel:Sie haben einen Netzanbieter abonniert . Um mit diesem Netzanbieter telefonieren zu können, müssen Sie z.B. „2345“ vorwählen. Zum Beispiel: Aus der Telefonnummer 00 46 46 2805000 wird automatisch 234500 46 46 2805000.
Achtung!Sie müssen beim gewünschten Netzanbieter angemeldet sein, um diesen Dienst nutzen zu können.Nur ein Anbieter kann aktiviert sein.
Least Cost Routing programmieren1. Halten Sie P gedrückt, bis angezeigt wird.2. Drücken Sie zweimal P. Das Display zeigt Lcr sowie on (aktiv) oder oFF
(inaktiv).3. Blättern Sie bis zur gewünschten Position mit v und V.4. Drücken Sie 0. Die linke Seite des Displays blinkt.5. Geben Sie die Ziffern ein, die ausgetauscht werden sollen (max. 4 Ziffern,
z.B. 00). Löschen oder ändern mit C.6. Wenn Sie weniger als vier Ziffern eingegeben haben, drücken Sie 0 um
weiterzugehen. Die rechte Seite des Displays blinkt.7. Geben Sie die Ziffern ein, die hinzugefügt werden sollen (max. 8 Ziffern,
z.B. 234500). Wenn schon eine Nummer gespeichert ist, können Sie diese mit C löschen.8. Beenden Sie mit 0.
Automatische Amtvorwahl mit Least Cost RoutingLeast Cost Routing kann auch benutzt werden, um vor alle Telefonnummern einen Präfix zu setzen. 1. Führen Sie die Schritte 1. - 4. wie oben beschrieben aus.2. Die linke Seite des Display muss leer sein. Wenn schon eine Nummer gespeichert ist, löschen Sie diese mit C.3. Führen Sie die Schritte 6. - 8. wie oben beschrieben aus.
Deutsch
www.doro.com 33
Allgemeines
Wenn das Telefon nicht funktioniertVergewissern Sie sich, dass das Telefonkabel unbeschädigt und korrekt eingesteckt ist. Entfernen Sie eventuelle Zusatzausrüstung, Verlängerungskabel und andere Telefone. Wenn das Gerät jetzt funktioniert, liegt der Fehler woanders.Versuchen Sie, das Telefon z.B. bei einem Nachbarn anzuschliessen. Wenn das Gerät dort funktioniert, ist Ihr Telefonanschluss vielleicht gestört. Rufen Sie die Störungsstelle an.
Wenn es klingelt, wird keine Nummer angezeigt- Die Rufnummeranzeige muss von Ihrem Netzbetreiber unterstützt werden.- Wenn im Display eine Textnachricht angezeigt ist , wurde entweder
keine Nummerinformation gesendet oder der Teilnehmer hat eine geheime Telefonnummer.
- Die Rufnummeranzeige funktioniert nicht , wenn das Telefon an eine Vermittlung angeschlossen ist.
Sollte das Telefon trotz der obenstehenden Massnahmen nicht funktionieren, bringen Sie das Telefon zu Ihrem Händler. Vergessen Sie nicht die Einkaufsquittung/Rechnung.
GarantieDieses Gerät hat die Warengarantiezeit von einem Jahr. Bei eventuellen Reklamationen wenden Sie sich bitte an Ihren Händler. Der Garantieservice wird nur mit gültiger Kaufquittung bzw. Rechnungskopie ausgeführt.
Die Garantie gilt nicht, wenn der Fehler aufgrund eines Unglücks oder ähnlichem entstanden ist. Weiterhin gilt die Garantie nicht bei Gewaltanwendung, eingedrungenen Flüssigkeiten, schlechter Wartung, Missbrauch oder anderer Fehler des Käufers. Die Garantie verfällt auch, wenn die Seriennummer des Telefons vernichtet wurde sowie bei Schäden die durch Gewitter oder andere Spannungsvariationen entstanden sind.
Bei Gewitter sollte das Telefon zur Sicherheit von der Steckdose getrennt werden.
Italiano
34 www.doro.com
Installazione
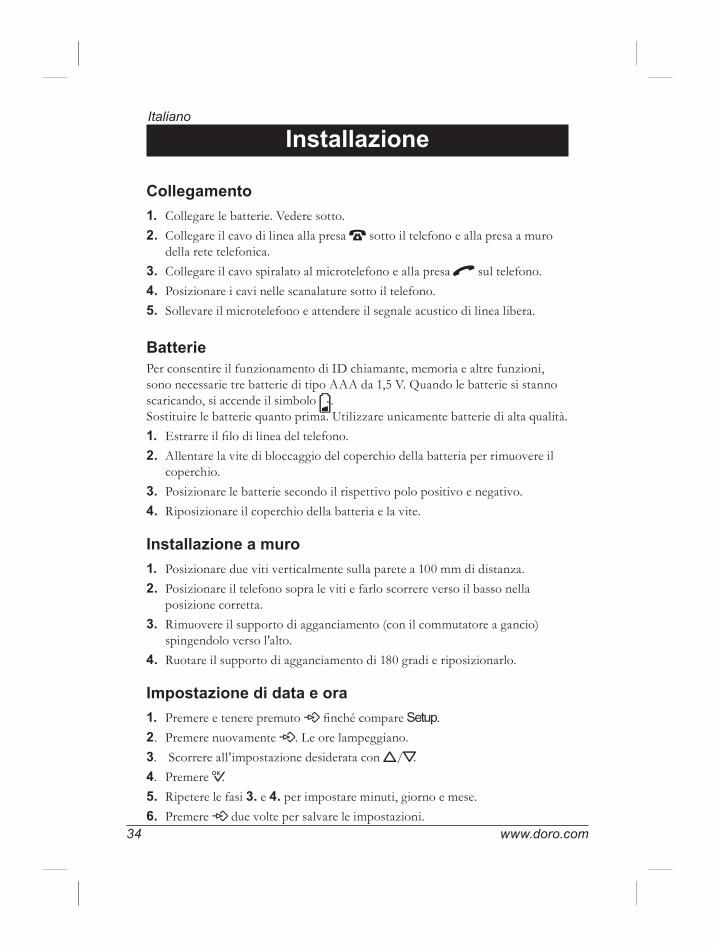
Collegamento1. Collegare le batterie. Vedere sotto.2. Collegare il cavo di linea alla presa T sotto il telefono e alla presa a muro
della rete telefonica. 3. Collegare il cavo spiralato al microtelefono e alla presa q sul telefono.4. Posizionare i cavi nelle scanalature sotto il telefono.5. Sollevare il microtelefono e attendere il segnale acustico di linea libera.
BatteriePer consentire il funzionamento di ID chiamante, memoria e altre funzioni, sono necessarie tre batterie di tipo AAA da 1,5 V. Quando le batterie si stanno scaricando, si accende il simbolo .Sostituire le batterie quanto prima. Utilizzare unicamente batterie di alta qualità.1. Estrarre il filo di linea del telefono.2. Allentare la vite di bloccaggio del coperchio della batteria per rimuovere il
coperchio.3. Posizionare le batterie secondo il rispettivo polo positivo e negativo.4. Riposizionare il coperchio della batteria e la vite.
Installazione a muro1. Posizionare due viti verticalmente sulla parete a 100 mm di distanza.2. Posizionare il telefono sopra le viti e farlo scorrere verso il basso nella
posizione corretta.3. Rimuovere il supporto di agganciamento (con il commutatore a gancio)
spingendolo verso l'alto.4. Ruotare il supporto di agganciamento di 180 gradi e riposizionarlo.
Impostazione di data e ora1. Premere e tenere premuto P finché compare .2. Premere nuovamente P. Le ore lampeggiano.3. Scorrere all'impostazione desiderata con v/V.4. Premere 0.5. Ripetere le fasi 3. e 4. per impostare minuti, giorno e mese.6. Premere P due volte per salvare le impostazioni.
Italiano
www.doro.com 35
Funzionamento
Funzione Vivavoce1. Premere s per attivare il vivavoce. Il LED si accende.2. Comporre il numero telefonico. Regolare il volume, se necessario, con
l'apposito comando situato lateralmente.3. Parlare nel microfono posto sul bordo anteriore del telefono.4. Premere s per concludere la chiamata.Eventualmente, è possibile passare dalla modalità microtelefono alla modalità vivavoce durante la conversazione.
Attenzione!In modalità vivavoce, può parlare soltanto una persona alla volta. Il passaggio tra vivavoce e microfono è automatico e dipende rispettivamente dal livello acustico sulla linea in entrata e dal livello acustico che giunge al microfono. È quindi essenziale che non vengano emessi suoni forti, come per esempio musica ad alto volume, nell'area circostante il telefono, in quanto disturberebbero la funzione vivavoce.
Pulsante AttesaIl microfono del microtelefono può essere disattivato durante una chiamata utilizzando z.Premere ancora una volta per riattivare il microfono.
Il display lampeggia finché la funzione è attiva.
Pulsante Ripetizione numeroÈ possibile ripetere gli ultimi cinque numeri composti utilizzando semplicemente r:1. Premere ripetutamente r per selezionare i numeri2. Premere 0 per comporre il numero.Eventualmente, è possibile passare dalla modalità microtelefono alla modalità vivavoce durante la conversazione.
Italiano
36 www.doro.com
Funzionamento
MemoriaIl telefono è dotato di 10 memorie di composizione rapida. Quando un numero telefonico viene memorizzato in un numero della memoria, per effettuare una chiamata è sufficiente premere due soli pulsanti. Le memorie sono numerate da 0 a 9.
Memorizzazione dei numeri di composizione rapida1. Premere e tenere premuto P finché compare .2. Inserire la posizione in memoria, 0-9.3. Inserire il numero di telefono (fino a 22 cifre). Utilizzare C per cancellazioni
o modifiche.4. Salvare premendo 0.5. Memorizzare altri numeri oppure premere C per tornare in modalità standby.
Utilizzo della composizione rapida1. Sollevare il ricevitore (o premere il pulsante s) e attendere il segnale
acustico di linea libera.2. Premere P.3. Premere un numero di composizione rapida da 0 a 9.
Premere r per inserire una pausa nel numero telefonico.In caso di modifica di un numero, memorizzare il nuovo numero nella posizione del vecchio.
Controllo volume microtelefonoIl volume è regolabile durante una chiamata tramite l'interruttore sul microtelefono.
SuoneriaIl segnale della suoneria può essere impostato in tre modalità – alto, basso oppure off – utilizzando l'interruttore sotto il telefono.
Italiano
www.doro.com 37
Funzionamento
TimerDopo la risposta a una chiamata, viene visualizzato un timer sul display per valutarne la durata.
Servizi di rete optionalPremere il pulsante Recall R seguito dal numero dell'interno nel caso in cui si sia collegati ad un centralino telefonico interno.L'accesso ai servizi di rete supplementari è disponibile utilizzando il pulsante Recall e i tasti e . Per ulteriori informazioni, contattare l'operatore di rete.
Italiano
38 www.doro.com
Identicazione chiamanteDescrizione dell'ID chiamanteL'ID chiamante consente di visualizzare il nome del chiamante prima di rispondere, i nomi di chi ha chiamato in vostra assenza, nonché di visualizzare i nomi di coloro che telefonano durante una chiamata.Le chiamate ricevute vengono memorizzate in ordine cronologico con il numero sequenziale indicato a sinistra in basso sul display.Il registro chiamate è in grado di memorizzare fino a 40 numeri telefonici. Quando il registro è pieno, il numero più vecchio viene cancellato automaticamente quando si registra una nuova chiamata.
Attenzione!Per visualizzare i numeri, è necessario avere un operatore di rete che fornisca il servizio ID chiamante e avere sottoscritto il servizio. Per ulteriori informazioni, contattare l'operatore.
Recupero e composizione di numeri in entrata.1. Premere v e V per scorrere tra i numeri telefonici delle chiamate ricevute.2. Premere 0 per comporre il numero oppure attendere che il display torni
in modalità standby.Eventualmente, è possibile passare dalla modalità microtelefono alla modalità
vivavoce durante la conversazione.
MessaggiOltre ai numeri telefonici, il display può visualizzare:
Si tratta di una chiamata internazionale o da un PBX (nessuna informazione ricevuta)
La chiamata proviene da un numero bloccato o PBX. Sono giunte numerose chiamate da questo numero telefonico.
5 Indicazione di messaggio (inviata dall'operatore di rete). Inoltre l'indicatore 5 lampeggia due volte di seguito.
Cancellazione dei numeri1. Scorrere alla posizione desiderata utilizzando v/V.2. Premere c. La posizione lampeggia.3. Premere ancora una volta C per cancellare il numero.
Cancellazione di tutti i numeri1. Scorrere alla posizione desiderata utilizzando v/V.2. Premere e tenere premuto c finché sul display non compare -00- CALLS .
Italiano
www.doro.com 39
Routing economicoUtilizzo del routing economicoQuesta funzione seleziona automaticamente l'operatore telefonico scelto. È possibile impostare il telefono per aggiungere e/o sostituire alcune cifre nei numeri telefonici. Per selezionare un determinato operatore, normalmente è necessario comporre un prefisso prima del numero telefonico vero e proprio.Esempio.È stato scelto un determinato operatore per le chiamate internazionali. Per eseguire le chiamate con questo operatore, è necessario comporre, per esempio, 9502 prima del prefisso internazionale. È possibile impostare la funzione di routing economico in modo che quando si compone un numero che inizia con 00, il telefono lo sostituisce automaticamente con 950200. Per esempio, il numero 0046 46 2805000 diventerebbe automaticamente 9502 0046 46 2805000
Attenzione!Per eseguire una chiamata con un determinato operatore è necessario avere sottoscritto l'abbonamento. È possibile attivare una sola impostazione di routing economico alla volta.
Impostazione di routing economico.1. Premere e tenere premuto P finché compare .2. Premere due volte P. Il display visualizza Lcr e on (attivo) oppure oFF
(off).3. Scorrere alla funzione desiderata utilizzando v/V.4. Premere 0. Il lato sinistro del display lampeggia.5. Inserire la sequenza da sostituire (fino a quattro cifre, per esempio 00). Utilizzare C per cancellazioni o modifiche.6. Se sono state inserite meno di quattro cifre, premere 0 per proseguire. Il
lato destro del display lampeggia.7. Inserire la sequenza da aggiungere (fino a otto cifre, per esempio 950200). È possibile cancellare un numero eventualmente già inserito utilizzando C.8. Terminare premendo 0.
Presso di rete automatico con routing economicoLa funzione di routing economico è utilizzabile unicamente per inserire numeri prima di tutti i numeri telefonici. 1. Seguire le fasi 1. - 4. (vedere sopra).2. Il lato sinistro del display deve essere vuoto. È possibile cancellare un numero eventualmente già inserito utilizzando C.3. Seguire le fasi 6. - 8. (vedere sopra).
Italiano
40 www.doro.com
Varie
Ricerca e individuazione guastiVerificare che il cavo telefonico non sia danneggiato e che la spina sia correttamente inserita. Scollegare qualsiasi altro apparecchio eventualmente collegato. Se il problema viene risolto, il difetto può essere attribuito all'altro apparecchio.Provare l'apparecchio con una linea del cui funzionamento si è certi (ad esempio quella di un vicino). Se il prodotto funziona, il difetto può essere attribuito alla linea.
Quando si riceve una chiamata non viene visualizzato nessun numero.- Affinché questa funzione sia svolta correttamente, è necessario sottoscrivere
il servizio ID chiamante presso il fornitore di rete.- Se nel display viene visualizzato un messaggio, può trattarsi di una chiamata
internazionale (nessun dato ricevuto), oppure da un numero privato o bloccato.
- Può essere impossibile ricevere informazioni CID se il telefono opera in sistema PBX.
Se il telefono continua a non funzionare, contattare il rivenditore e richiedere l’assistenza. Non dimenticare la ricevuta o la copia della fattura.
GaranziaIl presente prodotto è garantito per un periodo di 12 mesi a decorrere dalla data di acquisto. Per avere diritto a qualsiasi servizio o assistenza durante il periodo di garanzia è necessario presentare il relativo documento di acquisto.
La presente garanzia non verrà applicata ad eventuali guasti causati da incidenti o infortuni o danni simili, eventuale penetrazione di liquidi, negligenza, uso anomalo o qualsiasi altra circostanza simile da parte dell'acquirente. Inoltre, la presente garanzia non verrà applicata ad eventuali guasti causati da temporali o da qualsiasi altra variazione della tensione.
La presente garanzia non influisce in alcun modo sui diritti legali del proprietario. (Come misura precauzionale, si consiglia di scollegare il telefono durante i temporali.)
Polski
www.doro.com 41
Instalacja
Podłączanie1. Włóż baterie. Patrz niżej.2. Podłącz przewód telefoniczny do gniazdka sieci telefonicznej oraz do
gniazdka telefonu oznaczonego symbolem T. 3. Podłącz przewód spiralny do słuchawki i do gniazdka oznaczonego q,
które znajduje się na telefonie.4. Ułóż kable w rowkach pod spodem telefonu.5. Podnieś słuchawkę i sprawdź, czy słychać ciągły sygnał wybierania.
BaterieAby możliwe było działanie mechanizmu identyfikacji abonenta wywołującego, pamięci i innych funkcji, telefon musi być wyposażony w trzy baterie 1,5 V typu AAA. Gdy baterie będą bliskie wyczerpania, pojawi się symbol .W takim wypadku należy jak najszybciej wymienić baterie. Należy używać wyłącznie baterii wysokiej jakości.1. Wyjmij przewód linii telefonicznej.2. Odkręć śrubę mocującą pokrywę baterii, aby zdjąć pokrywę.3. Włóż baterie zachowując właściwą biegunowość.4. Załóż pokrywę i dokręć śrubę.
Montaż na ścianie1. Wkręć dwa wkręty ułożone jeden nad drugim w odległości 100 mm.2. Umieść telefon nad wkrętami i wsuń go w dół na właściwe miejsce.3. Wyjmij wieszak (obok miejsca na słuchawkę), pchając go ku górze.4. Obróć wieszak o 180 stopni, po czym ponownie go załóż.
Ustawianie godziny i daty1. Naciśnij i przytrzymaj P, dopóki nie pojawi się .2. Ponownie naciśnij P. Godzina zacznie pulsować.3. Za pomocą przycisków v/V ustaw odpowiednią wartość.4. Naciśnij 0.5. Powtarzając czynności 3. i 4., ustaw minutę, dzień i miesiąc.6. Dwukrotnie naciśnij P, aby zapisać ustawienia.
Polski
42 www.doro.com
Obsługa
Korzystanie z głośnika1. Naciśnij s. Głośnik zostanie włączony, a dioda LED zaświeci się.2. Wybierz numer telefoniczny. W razie potrzeby wyreguluj głośność,
korzystając z regulatora umieszczonego z boku.3. Mówić należy do mikrofonu umieszczonego na przedniej krawędzi aparatu.4. Naciśnij s, aby zakończyć rozmowę.W trakcie rozmowy można przełączać się między głośnikiem a słuchawką.
Uwaga!Pamiętaj, że gdy aktywny jest głośnik, mówić może tylko jedna osoba na raz. Przełączanie międz y głośnikiem a mikrofonem odbywa się automatycznie, w zależności od głośności na linii oraz natężenia dźwięku dochodzącego do mikrofonu. Dlatego, aby aparat działał poprawnie w tym trybie, w otoczeniu nie powinny występować silne źródła dźwięku (np. nie powinna być odtwarzana głośna muz yka).
Przycisk zawieszaniaZa pomocą przycisku z można odłączyć mikrofon słuchawki w trakcie rozmowy.Kolejne naciśnięcie tego samego przycisku ponownie uaktywni mikrofon.
Gdy funkcja ta jest aktywna, wyświetlacz pulsuje.
Przycisk ponownego wybieraniaZa pomocą przycisku r można powtarzać pięć ostatnio wybranych numerów.1. Naciskając przycisk r przeglądaj ostatnie numery.2. Naciśnij przycisk 0, co spowoduje wybranie numeru.W trakcie rozmowy można przełączać się między głośnikiem a słuchawką.
Polski
www.doro.com 43
Obsługa
PamięćW pamięci telefonu można zapisać 10 numerów, przeznaczonych do szybkiego wybierania. Aby wybrać numer przechowywany w pamięci, wystarczy nacisnąć dwa przyciski. Pozycje, pod którymi przechowywane są numery, oznaczone są cyframi 0-9.
Zapamiętywanie numerów do szybkiego wybierania1. Naciśnij i przytrzymaj P, dopóki nie pojawi się .2. Wprowadź pozycję pamięci, 0-9. 3. Wprowadź numer telefoniczny (maksymalnie 22 cyfry). Przycisk C
umożliwia usuwanie lub zmianę cyfr.4. Zapisz numer, naciskając 0.5. Zapisz kolejne numery albo naciśnij C , aby powrócić do trybu gotowości.
Szybkie wybieranie1. Podnieś słuchawkę (lub naciśnij przycisk s ) i poczekaj na sygnał
wybierania.2. Naciśnij P.3. Naciśnij przycisk szybkiego wybierania, 0-9.
Aby wprowadzić przerwę w numerze telefonicznym, naciśnij prz ycisk r.W prz ypadku zmiany numeru, nowy numer należ y zapisać w miejsce starego.
Sterowanie głośnością słuchawkiZa pomocą przełącznika na słuchawce można regulować głośność podczas rozmowy.
DzwonekDzwonek może działać w trybie głośnym, cichym lub być wyłączony - wyboru dokonuje się przełącznikiem , umieszczonym na spodzie telefonu.
Polski
44 www.doro.com
Obsługa
Czas połączeniaPo rozpoczęciu rozmowy na wyświetlaczu pojawia się informacja o czasie. Ułatwia ona kontrolowanie czasu trwania połączenia.
Dodatkowe usługi siecioweAby przenieść połączenie, gdy telefon jest podłączony do centrali abonenckiej, naciśnij przycisk R, a następnie wybierz numer wewnętrzny.Za pomocą przycisku przenoszenia wywołań R oraz przycisków * i # można uzyskać dostęp do dodatkowych usług sieci telefonicznej. Więcej informacji na ten temat można uzyskać u operatora sieci.
Polski
www.doro.com 45
Identykacja abonenta wywołującegoWyjaśnienie działania funkcjiIdentyfikacja abonenta wywołującego pozwala sprawdzić kto dzwoni, przed podniesieniem słuchawki, uzyskać informacje o połączeniach nieodebranych w czasie nieobecności oraz sprawdzić kto dzwoni, w trakcie prowadzenia rozmowy rozpoczętej wcześniej.Numery abonentów wywołujących są rejestrowane chronologicznie, a numery kolejne wyświetlane są w lewym dolnym rogu wyświetlacza. Rejestr mieści maksymalnie 40 numerów telefonicznych. Gdy rejestr jest całkowicie zapełniony, zarejestrowanie nowego połączenia powoduje automatyczne usunięcie najstarszego numeru.Uwaga!Aby numery były wyświetlane, operator sieciowy musi udostępniać usługę identyfikacji abonenta wywołującego (Caller ID) i usługa ta musi być uaktywniona. Więcej informacji na ten temat można uz yskać u operatora.
Przeglądanie i wybieranie numerów połączeń przychodzących1. Za pomocą v i V przewijaj listę numerów połączeń przychodzących.2. Naciśnij 0, aby wybrać numer, albo poczekaj na powrót do trybu gotowości.W trakcie rozmowy można przełączać się między głośnikiem a słuchawką.
KomunikatyOprócz numerów telefonicznych na wyświetlaczu mogą pojawiać się następujące symbole: Jest to połączenie międzynarodowe lub połączenie z centrali
abonenckiej (nie odebrano informacji). Połączenie spod zablokowanego numeru albo z centrali abonenckiej. Spod tego numeru odebrano kilka połączeń.
5 Wskaźnik wiadomości (wysyłany przez operatora sieci). Ponadto wskaźnik 5 dwukrotnie zapala się i gaśnie.
Usuwanie numerów1. Za pomocą przycisków v/V wybierz odpowiednią pozycję na liście.2. Naciśnij c. Pozycja zacznie pulsować.3. Ponownie naciśnij C , aby usunąć numer.
Usuwanie wszystkich numerów1. Za pomocą przycisków v/V wybierz odpowiednią pozycję na liście.2. Naciśnij i przytrzymaj c, dopóki na wyświetlaczu nie pojawi się napis
-00- CALLS .
Polski
46 www.doro.com
Wybór operatoraKorzystanie z funkcji wyboru operatoraTa funkcja automatycznie wybiera operatora sieci telefonicznej. Telefon może dodawać cyfry i/lub zastępować wybrane cyfry w numerach telefonicznych. W celu wybrania konkretnego operatora sieci, należy zwykle przed właściwym numerem wybrać kod operatora.Przykład:Wybrano operatora połączeń międzymiastowych. Aby zrealizować połączenie za pośrednictwem sieci tego operatora, należy wybrać kod operatora przed numerem kierunkowym miejscowości. Można tak skonfigurować funkcję wyboru operatora, by wybrany przez użytkownika prefiks i numer kierunkowy np. „012" był zawsze automatycznie zamieniany na 012 + kod operatora. Aparat może obsłużyć jednocześnie dwa prefiksy.
Uwaga!Aby zrealizować połączenie za pośrednictwem wybranego operatora, uż ytkownik musi mieć prawo do korz ystania z jego usług.Na raz może być aktywne tylko jedno ustawienie wyboru operatora.
Konguracja wyboru operatora1. Naciśnij i przytrzymaj P, dopóki nie pojawi się .2. Dwukrotnie naciśnij P. Na wyświetlaczu pojawi się napis Lcr oraz on
(funkcja aktywna) lub oFF (funkcja wyłączona).3. Za pomocą przycisków v/V wybierz odpowiednią funkcję.4. Naciśnij 0. Lewa strona wyświetlacza zacznie pulsować.5. Wprowadź sekwencję, która ma być zastępowana (maksymalnie 4 cyfry). Przycisk C umożliwia usuwanie lub zmianę cyfr.6. Jeśli wprowadzono mniej niż cztery cyfry, naciśnij 0, aby kontynuować.
Prawa strona wyświetlacza zacznie pulsować.7. Wprowadź sekwencję, która ma być dodawana (maksymalnie 8 cyfr). Jeśli jest już wprowadzony numer, można go skasować przyciskiem C.8. Zakończ procedurę, naciskając 0.
Polski
www.doro.com 47
Wybór operatoraAutomatyczne dodawanie preksu sieciFunkcja wyboru operatora może także służyć do dodawania cyfr przed wszystkimi numerami telefonicznymi. 1. Wykonaj czynności 1. - 4. (patrz poprzednia strona).2. Lewa strona wyświetlacza powinna być pusta. Jeśli jest tam już wprowadzony numer, skasuj go przyciskiem C.3. Wykonaj czynności 6. - 8. (patrz poprzednia strona).
Polski
48 www.doro.com
Inne
Rozwiązywanie problemówNależy sprawdzić, czy przewód telefoniczny nie jest uszkodzony i czy jest prawidłowo podłączony. Należy odłączyć wszelkie dodatkowe urządzenia, jeśli są podłączone. Jeśli problem został rozwiązany, uszkodzenie występuje w innym urządzeniu.Aparat należy przetestować z inną, sprawną linią telefoniczną (np. u sąsiada) - jeśli będzie działał, to uszkodzona jest linia.
Nie jest wyświetlany numer abonenta wywołującego- Aby działała funkcja identyfikacji abonenta wywołującego, konieczne jest
zamówienie usługi identyfikacji (Caller Identification) u operatora sieci telefonicznej.
- Pojawienie się komunikatu na wyświetlaczu może oznaczać połączenie międzynarodowe (wówczas nie jest możliwe odebranie danych) albo połączenie spod numeru zastrzeżonego bądź zablokowanego.
- Identyfikacja abonenta wywołującego może być niemożliwa, jeśli telefon jest podłączony do centrali abonenckiej.
Jeśli aparat nadal nie działa, należy skontaktować się z serwisem. Konieczne będzie przedstawienie kopii rachunku lub kopii faktury zakupu.
GwarancjaProdukt ten jest objęty 12-miesięczną gwarancją, liczoną od daty zakupu. Warunkiem skorzystania z serwisu i pomocy technicznej w okresie gwarancji jest przedstawienie dowodu zakupu.
Gwarancja nie obejmuje uszkodzeń powstałych w wyniku wypadku lub podobnych zniszczeń, spowodowanych przedostaniem się płynu do wnętrza aparatu, niedbałością, niewłaściwym użytkowaniem lub innymi przyczynami leżącymi po stronie nabywcy. Ponadto gwarancja nie obejmuje uszkodzeń spowodowanych przez burze i inne skoki napięcia.
Gwarancja w żaden sposób nie wpływa na ustawowe uprawnienia nabywcy. (Ze względów bezpieczeństwa zaleca się odłączanie telefonu podczas burzy.)• INFO LINIA pomocy technicznej: 0-801-67-48-88, czynna od 8.00-16.00
od poniedziałku do piątku z wyjątkiem świąt i dni wolnych od pracy.• INTERNET: www.doro.atlantel.pl


www.doro.com