HOWTO reconfigure fibre channel attached disk …...How to Reconfigure Fibre Channel Attached Disk...
23
How to Reconfigure Fibre Channel Attached Disk Storage Devices in Solaris EMC Proven™ Professional Knowledge Sharing Diedrich Ehlerding, Fujitsu Siemens Computers GmbH, Germany [email protected] EMC Proven Professional Knowledge Sharing 2008 1
Transcript of HOWTO reconfigure fibre channel attached disk …...How to Reconfigure Fibre Channel Attached Disk...
How to Reconfigure Fibre Channel Attached
Disk Storage Devices in Solaris
EMC Proven™ Professional Knowledge Sharing
Diedrich Ehlerding, Fujitsu Siemens Computers GmbH, Germany
EMC Proven Professional Knowledge Sharing 2008 1
Table of Contents
Introduction ................................................................................................................................ 4 Why reconfigure? ................................................................................................................... 4 How to reconfigure?............................................................................................................... 6
Solaris driver layers.................................................................................................................... 6 Fibre channel HBAs and drivers ............................................................................................ 7 Disk driver layer and disk device nodes................................................................................. 7 Solaris 8 with lpfc driver ....................................................................................................... 8 Solaris 9 and 10 with lpfc driver ............................................................................................ 9 Solaris 8, 9 or 10, Leadville driver...................................................................................... 10
Multipathing layers .................................................................................................................. 12 EMC PowerPath................................................................................................................... 12 mpxio.................................................................................................................................... 13 Veritas DMP......................................................................................................................... 14
Volume manager layer - Veritas SF (mainly version 5.0) ....................................................... 14 EMC Solution Enabler considerations ..................................................................................... 16 Procedures ................................................................................................................................ 17
General procedure to reconfigure......................................................................................... 17 Example procedures ............................................................................................................. 18
Leadville + EMC PowerPath + SF5.0 environment....................................................... 18 Leadville, SF5.0 DMP Environment , no PowerPath ...................................................... 21 Solaris 9, lpfc.................................................................................................................... 22 mpxio................................................................................................................................ 22
Acknowledgements .................................................................................................................. 23
Disclaimer: The views, processes or methodologies published in this article are those of the authors. They do not necessarily reflect EMC Corporation’s views, processes or methodologies.
EMC Proven Professional Knowledge Sharing 2008 2

Abstract This article describes why and how we reconfigure Solaris server devices that access
(usually fibre channel attached) disk arrays over fibre channel host bus adapters (HBAs)
without a reboot. It considers Solaris, multipathing, and volume manager layers with the
primary focus on Emulex HBAs, EMC PowerPath® as the multipathing layer, and Symantec’s
Veritas Storage Foundation 5.0 as the Volume manager layer.
All layers require their own reconfiguration procedure to avoid subsequent issues. In
particular, deconfiguration processes are difficult and error-prone. The reconfiguration must
be performed layer by layer, in a certain sequence, and there are mutual influences of HBA
drivers, multipathing layers and volume manager layers.
The reader is assumed to be basically familiar with Solaris.
EMC Proven Professional Knowledge Sharing 2008 3
Introduction
Why reconfigure? I am discussing a standard storage area network (SAN) configuration - one or more servers,
connected via fibre channel host bus adapters to RAID arrays. Servers change their role,
new applications will be implemented, database table spaces grow, and soon, servers need
more storage capacity. Applications are switched to other servers, and the server that
previously owned this data will lose access. The peripheral device configuration will change;
and as a result the server must be reconfigured.
Growth of demand for capacity usually drives the reconfiguration of a server. Someone
wants to make new devices visible to the operating system. RAID arrays allow us to add
capacity to the array, and to make it visible to a host; SAN infrastructure allows us to make
new arrays visible to a host. The usual customer demand is to make this additional capacity
available to the host without any downtime, without rebooting. Current Solaris driver layers
make this process easy.
The corresponding deconfiguration process (a number of previously attached disks shall be
removed from the server)- is less frequent. At first glance, there seems to be no direct need
to immediately reconfigure the device layer if no further access attempts to the device node
are expected. However, be aware of higher software layers .
As an example, consider Veritas SF; some of its components may periodically rescan all
devices and may be affected adversely from missing devices. Or consider system
surveillance tools that will constantly complain about allegedly failing disks or paths if disks
are removed without properly unconfiguring them. Proper deconfiguration of devices to be
removed may be a good idea. This deconfiguration process turned out to be error-prone and
difficult, since several software layers must be taken into account.
There are projects that regularly remove some disks and add others. They may have the ,
same addresses on the bus that the disks had before they were removed.
EMC Proven Professional Knowledge Sharing 2008 4

Here are some scenarios, beyond the simple growth of application, that make use of RAID
system functionality. They may require dynamic reconfiguration and deconfiguration of
devices that became invisible.
• Imagine a configuration of one or more large CLARiiON® arrays. Several Solaris
servers share these arrays that are configured into a large number of LUNs. Array
based point-in-time copies perform the backup –(snapshots, or clones in the
CLARiiONs). These snapshots are made visible to a backup server that copies the
snaps to tape, and restores the data from tape (if necessary) to the original devices.
For backup, you have to assign different snaps to the backup server and remove
them again; for restore you will have to assign the original devices. I strongly
discourage having the original devices and the snaps visible at the same time. The
volume manager layer on the backup host will be extremely confused when it scans
the disks. Therefore, the storage group configuration in your CLARiiON cannot be
static. You will have to remove and delete snaps and original devices into the backup
server’s storage group, and then reconfigure Solaris every time you backup or
restore a particular application.
• A similar solution on a DMX will contain a number of virtual devices (VDEVs) that are
mapped to the ports that the backup server can access. Maybe you have more than
one VDEV assigned to a single original device to hold copies of different points in
time. For restore purpose, the original devices will be mapped to these ports as well.
Again, the backup server must not see the snap and the original device
simultaneously, and it must not see more than one point-in-time copy from the same
original device. You will have to set up some symmask procedures to show only
those devices that are intended to be visible at a certain point in time, and you will
have to cause the backup server to rescan its disk configuration.
• Imagine a farm of Solaris servers sharing an array. A cluster solution will deploy
applications to these servers depending on server availability and performance
requirements. For security reasons, every server will only see those devices that
belong to the application that it currently carries. In this situation, you will have to
reassign disks to servers whenever the server changes its role (receive a new
application, lose an application).
EMC Proven Professional Knowledge Sharing 2008 5
How to reconfigure? Previous Solaris versions (before Solaris 9) required a reconfiguration reboot to scan and
detect devices that were added to the configuration (at least with those fibre channel host
bus adapters (HBAs) and drivers which -e.g - Fujitsu Siemens Computers had released in
their servers, and which were also frequently used for Sun servers). Beginning with Solaris
9, it was possible to rescan the attached configuration. Meanwhile, there are customer and
standard solutions requiring the addition and removal of disks to a Solaris server
dynamically (without rebooting the system).
The procedure depends on the fibre channel driver. Fujitsu Siemens formerly used Emulex
HBAs with Emulex’ lpfc driver; meanwhile, the native Solaris driver stack “Leadville” (aka
“SAN Foundation Suite”, “SFS”) is available for Emulex and Qlogic HBAs. These drivers
differ quite noticeably.
There are simple Solaris commands to rescan the fibre channel busses and to remove
invisible device nodes, unless these devices are still opened by a higher layer. So, we have
to look at layers above HBA and disk drivers; primarily multipathing layers such as
PowerPath®, Veritas dynamic multipathing (DMP), or Solaris mpxio, and volume manager
layers (I will discuss Veritas Volume Manager only). This article describes scenarios with
different HBA and disk drivers, with and without PowerPath (multipathing driver to EMC® and
other arrays) or other multipathing layers, and Veritas Storage Foundation. Other
multipathing drivers and/or volume managers may require similar procedures.
This article does not explicitly discuss other device types such as tapes; but as far as the
Solaris layer is concerned, the same methods apply to tape devices as well.
Solaris driver layers Several layers of drivers must be considered to update the device configuration of a Solaris
server. The fibre channel HBA driver is the lowest level, on top of it the scsi disk driver must
be considered, and on top of that layer, multipathing drivers and volume managers are
located.
In the following sections, I look at Solaris versions and driver versions. Dynamic device
reconfiguration became possible with Solaris 9; I include some hints for Solaris 8 for
background and completeness.
EMC Proven Professional Knowledge Sharing 2008 6
Fibre channel HBAs and drivers
This article concentrates on Emulex fibre channel HBAs. Many segments of the article are
valid for QLogic HBAs as well.
There may be several different drivers available in Solaris server environment for the same
HBA model. The HBA manufacturer provides a driver, and the operating system contains a
driver from SUN for some frequent HBAs. For example, for Emulex HBAs, there is the lpfc
driver from Emulex, and the emlxs driver contained in the so-called “Leadville” driver stack
(also known as “SAN Foundation suite”, or “SFS”). The Leadville driver stack also contains
a driver qlc for QLogic HBAs. In Solaris 8 and 9 environments, lpfc drivers were frequently
used and are still available; Leadville drivers for Emulex HBAs appeared with Solaris 10, but
are also available with Solaris 8 and 9.
There are noticeable differences between lpfc and emlxs drivers for both normal operation
and reconfiguration issues. The SCSI driver used on top of the HBA driver is the main
difference . The address range is another difference. Lpfc only allows LUN addresses from 0
to 255; Leadville HBA drivers can detect LUN addresses far beyond 255.
Disk driver layer and disk device nodes There are two different drivers for scsi disks in Solaris, sd and ssd. Either sd or ssd is used
depending on the fibre channel HBA driver. As for Emulex HBAs, lpfc driver uses sd, and
emlxs driver uses ssd as scsi disk driver on top. QLogic HBAs driven by qlc also use ssd.
All disks that are detected by sd must be contained in a configuration file “/kernel/drv/sd.conf”
that must contain an entry for every path to a disk. Adding or removing disks under sd control
always involves editing sd.conf. Disks under ssd control don’t need to be mentioned
explicitly in a configuration file.
If you are unsure about which driver your system is currently using, look into /dev/dsk
directory. Disks controlled by sd usually have a name c#t#d#s2 where “c#” is a small
number (the scsi target id which lpfc invented to map the WWN on, whereas ssd disks have
a name like “c#t############d#s2, where t############## is the WWN of the disk array’s
frontend port. Follow the link in /dev/dsk and look whether the disk is controlled by lpfc and
sd, or by emlxs and ssd; the driver is mentioned in /devices directory.
EMC Proven Professional Knowledge Sharing 2008 7
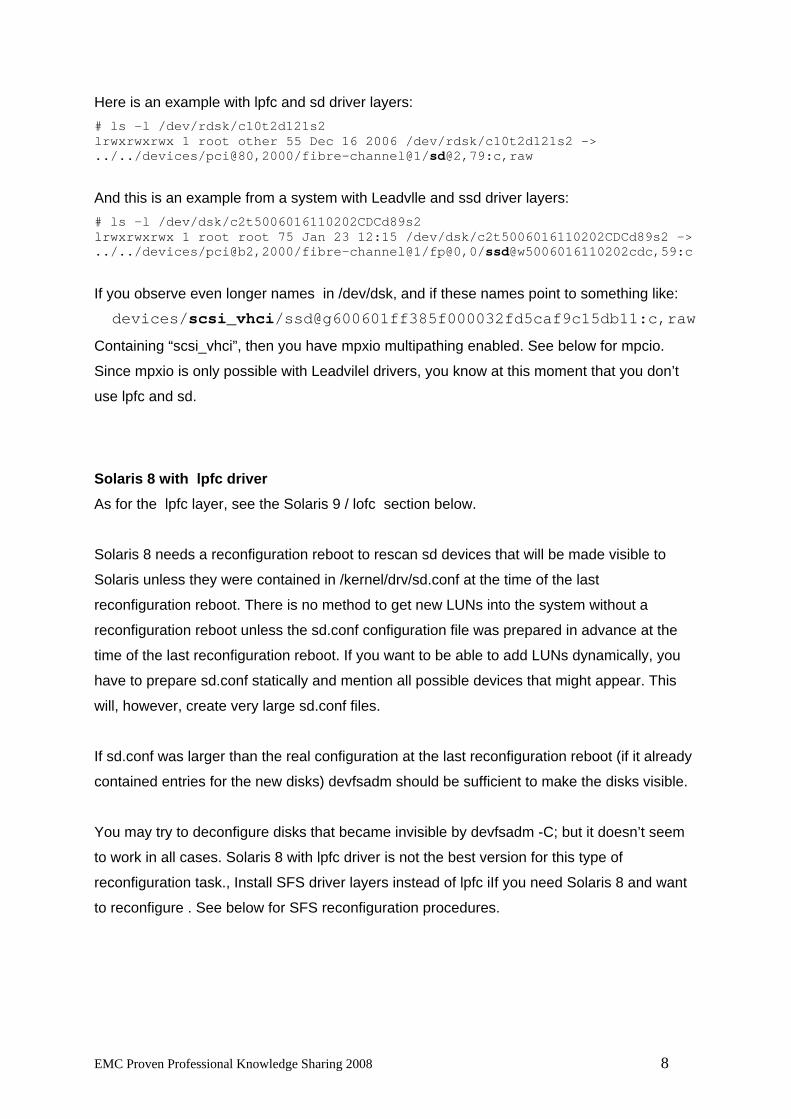
Here is an example with lpfc and sd driver layers: # ls -l /dev/rdsk/c10t2d121s2 lrwxrwxrwx 1 root other 55 Dec 16 2006 /dev/rdsk/c10t2d121s2 -> ../../devices/pci@80,2000/fibre-channel@1/sd@2,79:c,raw
And this is an example from a system with Leadvlle and ssd driver layers: # ls -l /dev/dsk/c2t5006016110202CDCd89s2 lrwxrwxrwx 1 root root 75 Jan 23 12:15 /dev/dsk/c2t5006016110202CDCd89s2 -> ../../devices/pci@b2,2000/fibre-channel@1/fp@0,0/ssd@w5006016110202cdc,59:c
If you observe even longer names in /dev/dsk, and if these names point to something like:
devices/scsi_vhci/ssd@g600601ff385f000032fd5caf9c15db11:c,raw
Containing “scsi_vhci”, then you have mpxio multipathing enabled. See below for mpcio.
Since mpxio is only possible with Leadvilel drivers, you know at this moment that you don’t
use lpfc and sd.
Solaris 8 with lpfc driver As for the lpfc layer, see the Solaris 9 / lofc section below.
Solaris 8 needs a reconfiguration reboot to rescan sd devices that will be made visible to
Solaris unless they were contained in /kernel/drv/sd.conf at the time of the last
reconfiguration reboot. There is no method to get new LUNs into the system without a
reconfiguration reboot unless the sd.conf configuration file was prepared in advance at the
time of the last reconfiguration reboot. If you want to be able to add LUNs dynamically, you
have to prepare sd.conf statically and mention all possible devices that might appear. This
will, however, create very large sd.conf files.
If sd.conf was larger than the real configuration at the last reconfiguration reboot (if it already
contained entries for the new disks) devfsadm should be sufficient to make the disks visible.
You may try to deconfigure disks that became invisible by devfsadm -C; but it doesn’t seem
to work in all cases. Solaris 8 with lpfc driver is not the best version for this type of
reconfiguration task., Install SFS driver layers instead of lpfc iIf you need Solaris 8 and want
to reconfigure . See below for SFS reconfiguration procedures.
EMC Proven Professional Knowledge Sharing 2008 8

Solaris 9 and 10 with lpfc driver When this paper was written, lpfc version 6.11c was the latest version released for EMC
arrays. Emulex announced newer versions that no longer need sd.conf, but I have no
experience with that driver. All lpfc versions that are released for EMC arrays need two
configuration files: /kernel/drv/lpfc.conf and /kernel/drv/sd.conf. lpfc.conf contains general
settings and the mapping from fibre channel world wide names (WWNs) to scsi target IDs;
sd.conf contains an entry for every (path to a) disk in the configuration.
lpfc needs an entry “automap=1” in lpfc.conf to detect new external RAIDsystems (identified
by their WWNs ) without a reboot. If automap=0 is set, new fibrechannel targets cannot be
detected without adding them into lpfc.conf’s persistent binding section and a subsequent
reconfiguration reboot. If automap=1 is set, the driver automatically assigns the next free scsi
ID when it detects a new target WWN which is not contained in its persistent bindings. This
scsi ID may be made persistent by an Emulex utility (lputil or HBAnyware), or by manually
editing lpfc.conf. If this mapping of WWNs to scsi IDs is not as you want it, there is an option
to use hotplug commands. However, they will only run on PCI hotplug capable machines,
and I do not discuss this topic here.
Beginning with Solaris 9, it is possible to add new entries to sd.conf (use the scsi ID which
lpfc created and which you see in lputil) as “target” and the new host LUN as “LUN”) and
then rescan disks under sd control.. Perform the following commands instead of a
reconfiguration reboot: update_drv -f sd devfsadm
If devices were removed, use devfsadm -C. Caution: devfsadm -C needs a preceding
update_drv -f sd, otherwise it does not remove the device nodes (even if you only removed
devices and did not add any new devices). Moreover, device nodes that are open will not be
removed. Please keep in mind that higher layers may have a device node open even though
it disappeared. Therefore, it is necessary to properly deconfigure the devices from these
layers before array reconfiguration. Multipathing drivers (PowerPath, DMP) or volume
managers are examples of these higher layers.
EMC Proven Professional Knowledge Sharing 2008 9
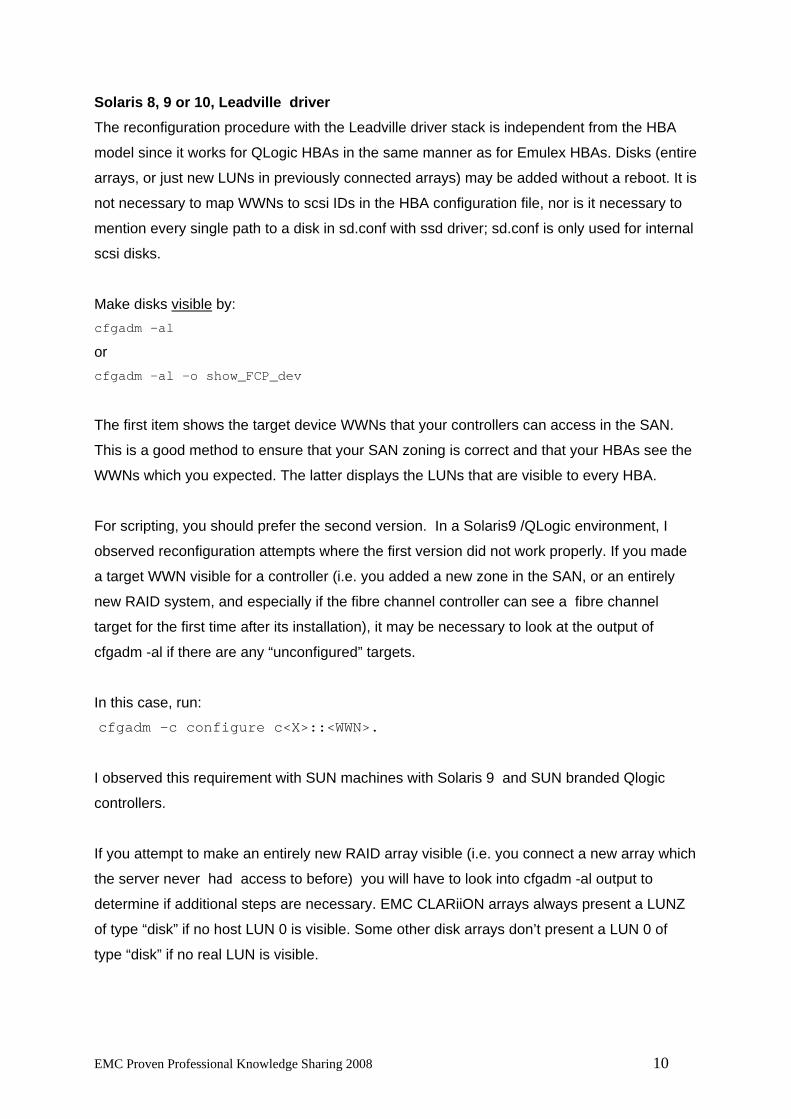
Solaris 8, 9 or 10, Leadville driver The reconfiguration procedure with the Leadville driver stack is independent from the HBA
model since it works for QLogic HBAs in the same manner as for Emulex HBAs. Disks (entire
arrays, or just new LUNs in previously connected arrays) may be added without a reboot. It is
not necessary to map WWNs to scsi IDs in the HBA configuration file, nor is it necessary to
mention every single path to a disk in sd.conf with ssd driver; sd.conf is only used for internal
scsi disks.
Make disks visible by: cfgadm -al
or cfgadm -al -o show_FCP_dev
The first item shows the target device WWNs that your controllers can access in the SAN.
This is a good method to ensure that your SAN zoning is correct and that your HBAs see the
WWNs which you expected. The latter displays the LUNs that are visible to every HBA.
For scripting, you should prefer the second version. In a Solaris9 /QLogic environment, I
observed reconfiguration attempts where the first version did not work properly. If you made
a target WWN visible for a controller (i.e. you added a new zone in the SAN, or an entirely
new RAID system, and especially if the fibre channel controller can see a fibre channel
target for the first time after its installation), it may be necessary to look at the output of
cfgadm -al if there are any “unconfigured” targets.
In this case, run: cfgadm -c configure c<X>::<WWN>.
I observed this requirement with SUN machines with Solaris 9 and SUN branded Qlogic
controllers.
If you attempt to make an entirely new RAID array visible (i.e. you connect a new array which
the server never had access to before) you will have to look into cfgadm -al output to
determine if additional steps are necessary. EMC CLARiiON arrays always present a LUNZ
of type “disk” if no host LUN 0 is visible. Some other disk arrays don’t present a LUN 0 of
type “disk” if no real LUN is visible.
EMC Proven Professional Knowledge Sharing 2008 10

Instead, Solaris detects an “ESI” device - anything else but not “disk”. In this case, you will
have to perform additional steps. These steps are only necessary for a new array and its
LUN 0; they will not be necessary for additional LUNs on that array.
Here are sample output lines of cfgadm -al -o show_FCP_dev with such an array: c2::207000c0ff03a268 ESI connected configured unknown c2::207000c0ff03a268,0 ESI connected configured unknown
Once you have mapped or masked a host LUN 0 instead of this dummy LUN 0, a
subsequent cfgadm command will display this LUN as present, and will display type disk
instead of ESI in cfgadm -al output, but it will not create the device nodes. When you see
your new array, and a LUN 0 appears in cfgadm output but no device nodes are created,
deconfigure the target that was formerly type ESI and configure it again. Then, you will see
the device nodes and can access the array.
In the example above, I used: cfgadm -c deconfigure c2::207000c0ff03a268 cfgadm -c configure c2::207000c0ff03a268
If you made disks invisible, use cfgadm -al -o show_FCP_dev followed by
devfsadm -C to cleanup /dev/dsk and /dev/rdsk directories. As with lpfc driver and
update_drv -f sd, devfsadm -C does not work unless preceded by cfgadm -al!
However, neither cfgadm -al -o show_FCP_dev nor cfgadm -al cleanup cfgadm’s memory
completely. The disks which were once visible and have now disappeared are still contained
in cfgadm’s output as “unusable” disks. If you want to eliminate these lines too, you will have
to deconfigure them explicitly. Example:
# cfgadm -al -o show_FCP_dev […] c5::50060160106019ff,0 disk connected configured unknown c5::50060160106019ff,27 disk connected configured unusable c5::50060160106019ff,28 disk connected configured unusable
i.e. LUN 0 is still visible, host LUNs 27 and 28 were visible before and disappeared now from
of the CLARiiON’s storage group. You will get rid of these “unusable” entries by cfgadm -o unusable_FCP_dev -c deconfigure c5::50060160106019ff
The same rules as with lpfc driver apply: if a device node is open, it cannot be removed.
PowerPath and/or Veritas open the device nodes that they know. Before you reconfigure the
Solaris layer, you will have to deal with upper layers such as PowerPath and/or Veritas.
EMC Proven Professional Knowledge Sharing 2008 11

Multipathing layers Fibre channel attached RAID systems usually offer a number of front-end ports to connect
hosts to. Hosts share these front-end ports over the SAN infrastructure. Servers are
frequently equipped with multiple HBAs and are operated with several IO paths to the same
logical disk in order to survive cable or HBA failures.
In this section, I look at three multipathing drivers and how to reconfigure them: PowerPath
is the preferred IO multipathing driver for EMC arrays and supports many other array types;
Veritas DMP comes with Veritas Storage Foundation from Symantec; and mpxio comes with
the SFS driver stack from Sun.
EMC PowerPath PowerPath must be reconfigured as well as the Solaris layers below it; t does not
automatically reconfigure. In PowerPath configurations, it is especially dangerous to
reconfigure a system to see a new device at the same address where it previously saw
another device (for example by removing a LUN from a storage group of a CLARiiON and
putting another LUN into the storage group). In this case, the Solaris device node (the
c#t#d#s# nodes in /dev/dsk and /dev/rdsk, and the nodes in /devices) remain unchanged
with Solaris reconfiguration commands; but PowerPath memorizes which Symmetrix symdev
or CLARiiON array LUN was visible at this address. You will not be able to access the new
disks unless PowerPath is properly reconfigured!
Remove PowerPath devices before you remove the corresponding Solaris devices;
otherwise, cfgadm -al && devfsadm -C will not remove the Solaris device nodes because
they are still flagged as “open”. This situation may subsequently cause trouble in other
layers, e.g. Veritas’ vxconfigd hangs. A disk that is under Veritas control is always opened by
Veritas. Therefore, remove it from Veritas control before you reconfigure PowerPath.
Remove PowerPath devices step by step by “powermt remove dev=emcpowerXYc”, where
XY denotes the PowerPath instance number of the device to be removed. Look at the output
of powermt display dev=all in order to determine a proper correlation of PowerPath and
Solaris naming spaces, or otherwise identify the disks that you want to remove in your
Symmetrix or CLARiiON array. Do not simply use “powermt remove dev=all” This command
removes all PowerPath device nodes which are currently not open, but leaves only one path
to every device that is currently open!
EMC Proven Professional Knowledge Sharing 2008 12

Once you have removed everything, save the configuration by powermt save.
Use the methods described above to reconfigure the Solaris device tree after removing the
emcpower devices which you want to get rid of. After having rescanned the Solaris device
nodes, make the newly discovered devices visible to PowerPath, and save the new
configuration, by powercf -q && powermt config && powermt save.
Caveat 1: Using this procedure, you cannot rely on getting the same emcpower instance if
you make a device invisible, detect other devices in the same array or in other arrays, and
make it visible again. Do not rely on the persistence of emcpower device names over this
kind of reconfiguration procedure! (In other words: use a volume manager on top of
PowerPath if you want to reconfigure your system.)
Caveat 2: if you use Veritas SF on top of PowerPath, be sure to stop the eventsource
daemon before scanning new LUNs. Otherwise, it may happen that some disks are
controlled by Veritas DMP and not by PowerPath!
mpxio
Notice: this part has not yet been tested by me in detail; I performed only some basic
functionality tests.
mpxio is a native Solaris multipathing driver belonging to the SFS driver stack. It can be used
for a large number of array types, including Symmetrix DMX and CLARiiON arrays.
If you use mpxio as a multipathing driver, no further configuration or deconfiguration beyond
the Solaris layer is necessary. Everything is done by cfgadm and devfsadm. If you run
Veritas SF on top of mpxio, you will have to remove disks from Veritas control before
deconfiguration for the same reasons as with PowerPath.
Caveat: Veritas SF is currently not released on top of mpxio unless you have SUN branded
arrays; so this configuration should never occur on EMC arrays. However, not all customers
are aware of this restriction.
EMC Proven Professional Knowledge Sharing 2008 13
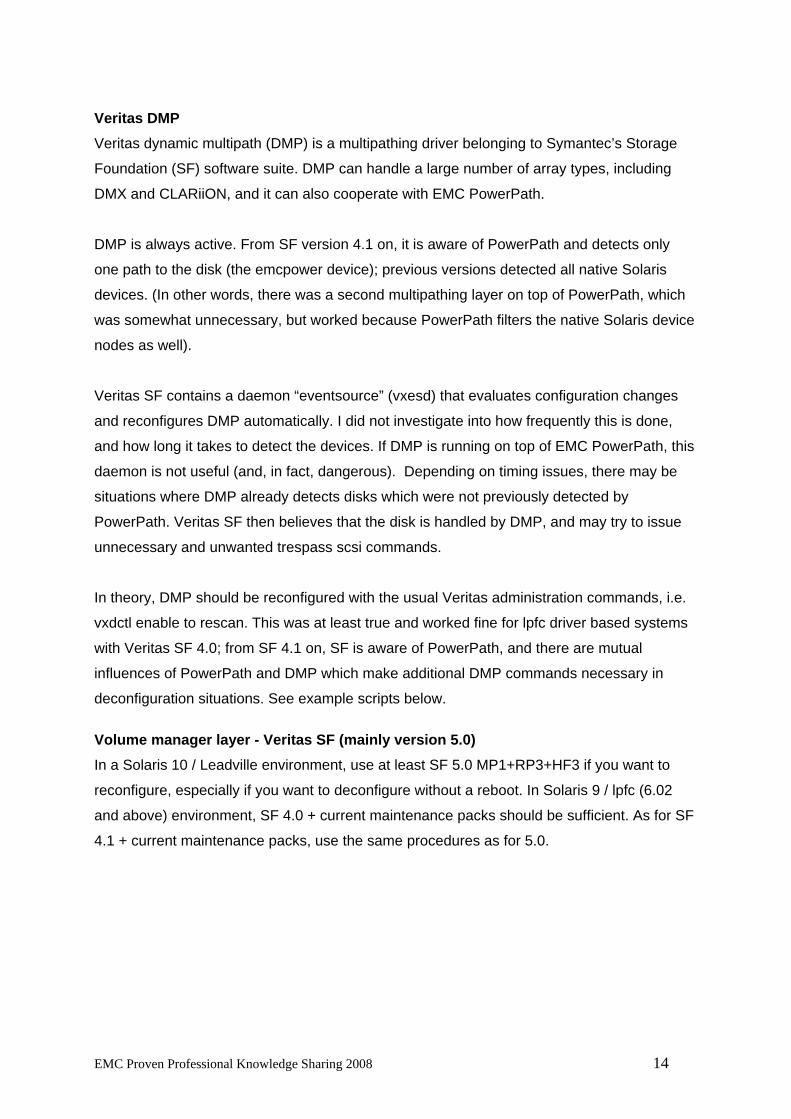
Veritas DMP Veritas dynamic multipath (DMP) is a multipathing driver belonging to Symantec’s Storage
Foundation (SF) software suite. DMP can handle a large number of array types, including
DMX and CLARiiON, and it can also cooperate with EMC PowerPath.
DMP is always active. From SF version 4.1 on, it is aware of PowerPath and detects only
one path to the disk (the emcpower device); previous versions detected all native Solaris
devices. (In other words, there was a second multipathing layer on top of PowerPath, which
was somewhat unnecessary, but worked because PowerPath filters the native Solaris device
nodes as well).
Veritas SF contains a daemon “eventsource” (vxesd) that evaluates configuration changes
and reconfigures DMP automatically. I did not investigate into how frequently this is done,
and how long it takes to detect the devices. If DMP is running on top of EMC PowerPath, this
daemon is not useful (and, in fact, dangerous). Depending on timing issues, there may be
situations where DMP already detects disks which were not previously detected by
PowerPath. Veritas SF then believes that the disk is handled by DMP, and may try to issue
unnecessary and unwanted trespass scsi commands.
In theory, DMP should be reconfigured with the usual Veritas administration commands, i.e.
vxdctl enable to rescan. This was at least true and worked fine for lpfc driver based systems
with Veritas SF 4.0; from SF 4.1 on, SF is aware of PowerPath, and there are mutual
influences of PowerPath and DMP which make additional DMP commands necessary in
deconfiguration situations. See example scripts below.
Volume manager layer - Veritas SF (mainly version 5.0) In a Solaris 10 / Leadville environment, use at least SF 5.0 MP1+RP3+HF3 if you want to
reconfigure, especially if you want to deconfigure without a reboot. In Solaris 9 / lpfc (6.02
and above) environment, SF 4.0 + current maintenance packs should be sufficient. As for SF
4.1 + current maintenance packs, use the same procedures as for 5.0.
EMC Proven Professional Knowledge Sharing 2008 14
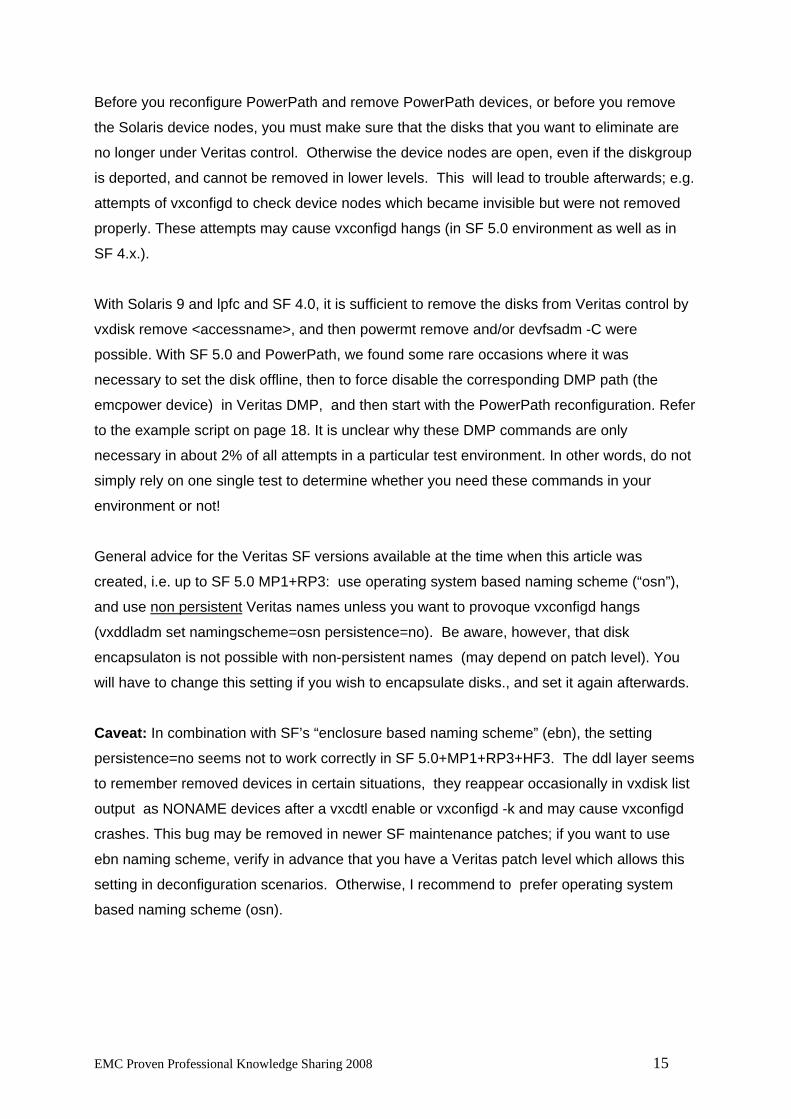
Before you reconfigure PowerPath and remove PowerPath devices, or before you remove
the Solaris device nodes, you must make sure that the disks that you want to eliminate are
no longer under Veritas control. Otherwise the device nodes are open, even if the diskgroup
is deported, and cannot be removed in lower levels. This will lead to trouble afterwards; e.g.
attempts of vxconfigd to check device nodes which became invisible but were not removed
properly. These attempts may cause vxconfigd hangs (in SF 5.0 environment as well as in
SF 4.x.).
With Solaris 9 and lpfc and SF 4.0, it is sufficient to remove the disks from Veritas control by
vxdisk remove <accessname>, and then powermt remove and/or devfsadm -C were
possible. With SF 5.0 and PowerPath, we found some rare occasions where it was
necessary to set the disk offline, then to force disable the corresponding DMP path (the
emcpower device) in Veritas DMP, and then start with the PowerPath reconfiguration. Refer
to the example script on page 18. It is unclear why these DMP commands are only
necessary in about 2% of all attempts in a particular test environment. In other words, do not
simply rely on one single test to determine whether you need these commands in your
environment or not!
General advice for the Veritas SF versions available at the time when this article was
created, i.e. up to SF 5.0 MP1+RP3: use operating system based naming scheme (“osn”),
and use non persistent Veritas names unless you want to provoque vxconfigd hangs
(vxddladm set namingscheme=osn persistence=no). Be aware, however, that disk
encapsulaton is not possible with non-persistent names (may depend on patch level). You
will have to change this setting if you wish to encapsulate disks., and set it again afterwards.
Caveat: In combination with SF’s “enclosure based naming scheme” (ebn), the setting
persistence=no seems not to work correctly in SF 5.0+MP1+RP3+HF3. The ddl layer seems
to remember removed devices in certain situations, they reappear occasionally in vxdisk list
output as NONAME devices after a vxcdtl enable or vxconfigd -k and may cause vxconfigd
crashes. This bug may be removed in newer SF maintenance patches; if you want to use
ebn naming scheme, verify in advance that you have a Veritas patch level which allows this
setting in deconfiguration scenarios. Otherwise, I recommend to prefer operating system
based naming scheme (osn).
EMC Proven Professional Knowledge Sharing 2008 15
With lpfc driver and SF 4.0, it was sufficient to run vxdctl enable to rescan the Veritas layers.
With SF 5.0, you should use vxconfigd -k instead of vxdctl enable, at least if you made disks
invisible. If you only added some new disks, vxdctl enable is usually sufficient.
In SF 5.0 configurations on top of PowerPath, and with the vxdmpadm disable commands
mentioned above, it may occasionally be necessary to re-enable dmp paths after rescan.
Enable all paths which you see in vxdisk -e list now. Enabling paths which are already
enabled should not have adverse effects. Refer to the example script on page 20.
EMC Solution Enabler considerations Here are some additional hints for EMC Symmetrix and CLARiiON arrays and their
management software. If you have other disk arrays which are managed via fibre channel,
similar considerations may be necessary.
• After you reconfigure Symmetrix devices, refresh your symcli database. Run symcfg
discover.
• if you have a Symmetrix and use Solution Enabler interfaces (i.e. symcli commands
or symapi calls) to manage it (e.g. a cluster which is SRDF aware, or TimeFinder
procedures), do not remove the corresponding PowerPath nodes just because your
script detects these emcpower devices as “not in use” and therefore regards them as
a candidate to be removed. Although EMC recommends against mapping
gatekeepers to a host over multiple paths, PowerPath does create emcpower device
nodes for single pathd gatekeeper. Clusters etc. may remember these emcpower
names. If you want to remove a gatekeeper device, be sure to remove it from the
symcli database and from the gkselect file in advance, and restart storapid
• If you want to remove an entire CLARiiON from the SAN, or if you want to remove a
host LUN 0 from a CLARiiON, stop Navisphere Agent before the reconfiguration and
restart it afterwards. Navisphere Agent opens LUN 0 to communicate with the
CLARiiON. Do this also if you had no LUN 0 before and want to make a host LUN 0
visible.
EMC Proven Professional Knowledge Sharing 2008 16
Procedures Combining all these layers results in the procedures described below. After a description of
the correct sequence, I enclose example shell procedures for three software configurations
that should perform the necessary steps automatically. Use these script skeletons (coming
as-is and without any maintenance!) as templates and adapt them to your configuration (e.g.
PowerPath or not) and needs. Properly check these procedures before you run them
unattended in a production environment.
Two procedures are necessary in deconfiguration situations: one to prepare the system to
accept devices to disappear, and a second to rescan everything and rebuild the necessary
device nodes in all affected driver layers. The rescan procedure is sufficient if you only add
disks.
General procedure to reconfigure 1. terminate all applications on the disks to be removed; unmount file systems on
disks which are going to disappear, deport diskgroups to disappear
2. remove disappearing devices from volume manager layer
3. remove disappearing devices in multipathing layers
4. reconfigure your SAN arrays (don’t reconfigure it before step 3!)
5. rediscover Solaris devices, create new device nodes, remove obsolete nodes
6. rescan multipathing layer
7. rescan volume manager layer
8. start application on new devices
If you only add disks, it is sufficient to run steps 4-8. Deconfiguration requires steps 1-8. The
example procedures below implement steps 2 and 3 (“prepare for deconfiguration”) and 5
thru 7. The scripts guess which devices are candidates for removal; therefore, they inspect
the Veritas configuration and regard all those disks that are not currently imported by SF as
potential candidates for removal . They remove these disks from PowerPath and SF layers.
This assumption may be not true; but then, the disks and the device nodes in all layers will
reappear when the configuration is rescanned.
In general, be patient. Reconfiguration commands may require minutes, especially in large
configurations. In particular, update_drv, cfgadm and devfsadm need some time.
EMC Proven Professional Knowledge Sharing 2008 17
Example procedures The procedures below assume that you already deported all diskgroups that you will
deconfigure. They do not check that assumption! There are two procedures; one “pre-
reconfiguration” script that deconfigures everything which is not in use, and one “configure”
script that creates everything that just became visible. Even if you only deconfigure devices,
run the configure script after RAID system reconfiguration.
Leadville + EMC PowerPath + SF5.0 environment The scripts below come from an environment with Solaris 10, PowerPath 5.0.1 and
SF5.0+MP1+RP3+HF3 attached to several EMC arrays (Symmetrix and CLARiiONs). This
customer runs Veritas with osn naming space and tpdmode=native naming scheme. You
should not change these settings.
The procedure to determine Veritas and corresponding PowerPath device names depends
on SF 5.0 and its usage of emcpower third party driver. SF 4.1 should be similar; I don’t have
such a system. Report your results if you have such a configuration; SF4.0 and earlier don’t
use PowerPath pseudo devices as 3rd-party driver
See deconfigure script on the next page.
EMC Proven Professional Knowledge Sharing 2008 18
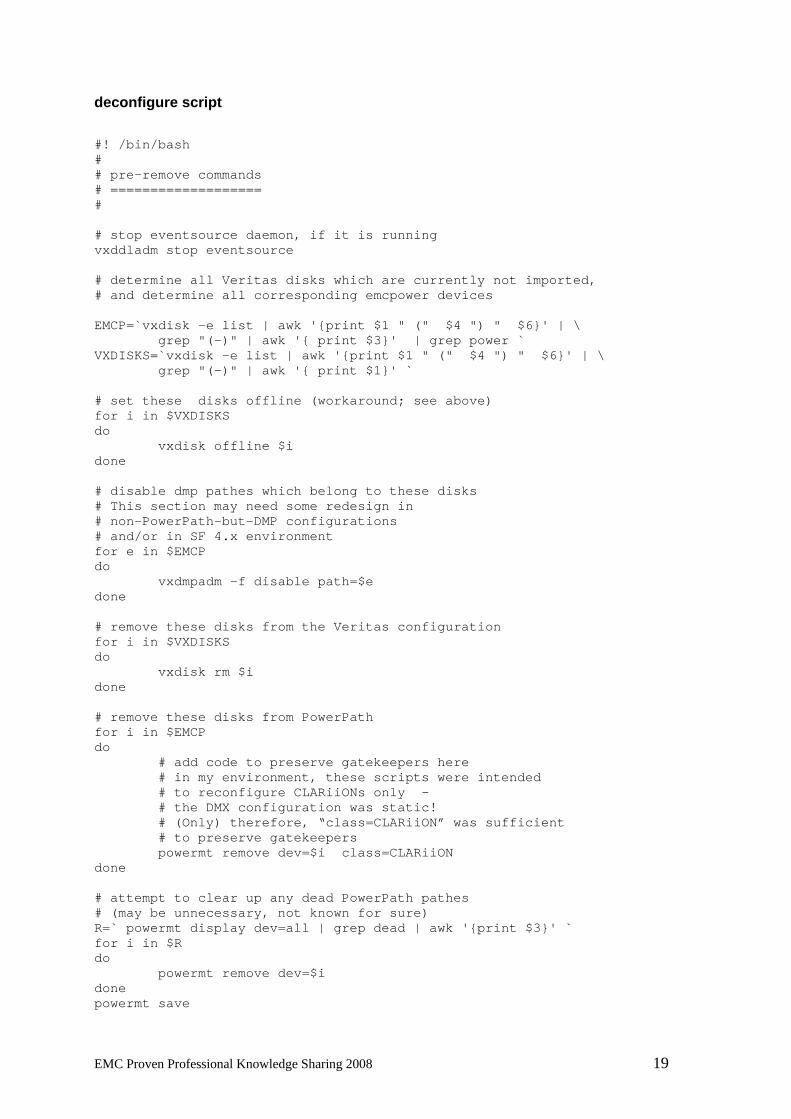
deconfigure script #! /bin/bash # # pre-remove commands # =================== # # stop eventsource daemon, if it is running vxddladm stop eventsource # determine all Veritas disks which are currently not imported, # and determine all corresponding emcpower devices EMCP=`vxdisk -e list | awk '{print $1 " (" $4 ") " $6}' | \ grep "(-)" | awk '{ print $3}' | grep power ` VXDISKS=`vxdisk -e list | awk '{print $1 " (" $4 ") " $6}' | \ grep "(-)" | awk '{ print $1}' ` # set these disks offline (workaround; see above) for i in $VXDISKS do vxdisk offline $i done # disable dmp pathes which belong to these disks # This section may need some redesign in # non-PowerPath-but-DMP configurations # and/or in SF 4.x environment for e in $EMCP do vxdmpadm -f disable path=$e done # remove these disks from the Veritas configuration for i in $VXDISKS do vxdisk rm $i done # remove these disks from PowerPath for i in $EMCP do # add code to preserve gatekeepers here # in my environment, these scripts were intended # to reconfigure CLARiiONs only - # the DMX configuration was static! # (Only) therefore, “class=CLARiiON” was sufficient # to preserve gatekeepers powermt remove dev=$i class=CLARiiON done # attempt to clear up any dead PowerPath pathes # (may be unnecessary, not known for sure) R=` powermt display dev=all | grep dead | awk '{print $3}' ` for i in $R do powermt remove dev=$i done powermt save
EMC Proven Professional Knowledge Sharing 2008 19
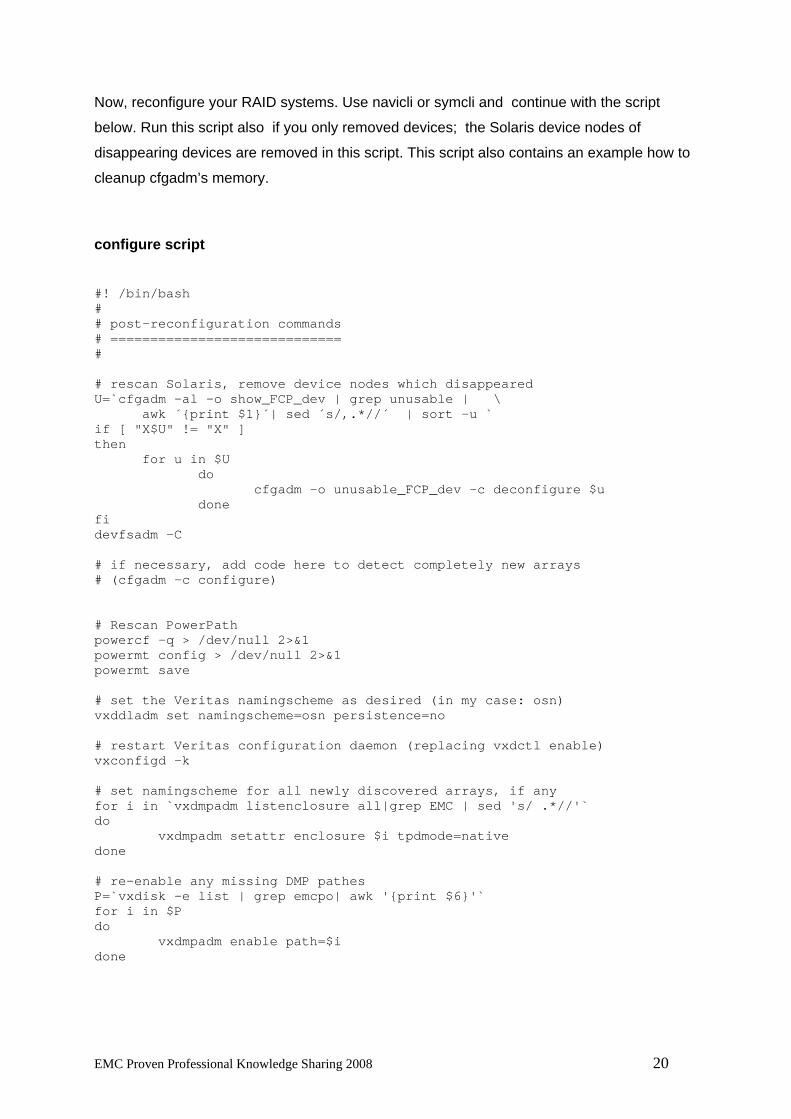
Now, reconfigure your RAID systems. Use navicli or symcli and continue with the script
below. Run this script also if you only removed devices; the Solaris device nodes of
disappearing devices are removed in this script. This script also contains an example how to
cleanup cfgadm’s memory.
configure script #! /bin/bash # # post-reconfiguration commands # ============================= # # rescan Solaris, remove device nodes which disappeared U=`cfgadm -al -o show_FCP_dev | grep unusable | \ awk ´{print $1}´| sed ´s/,.*//´ | sort -u ` if [ "X$U" != "X" ] then for u in $U do cfgadm -o unusable_FCP_dev -c deconfigure $u done fi devfsadm -C # if necessary, add code here to detect completely new arrays # (cfgadm -c configure) # Rescan PowerPath powercf -q > /dev/null 2>&1 powermt config > /dev/null 2>&1 powermt save # set the Veritas namingscheme as desired (in my case: osn) vxddladm set namingscheme=osn persistence=no # restart Veritas configuration daemon (replacing vxdctl enable) vxconfigd -k # set namingscheme for all newly discovered arrays, if any for i in `vxdmpadm listenclosure all|grep EMC | sed 's/ .*//'` do vxdmpadm setattr enclosure $i tpdmode=native done # re-enable any missing DMP pathes P=`vxdisk -e list | grep emcpo| awk '{print $6}'` for i in $P do vxdmpadm enable path=$i done
EMC Proven Professional Knowledge Sharing 2008 20

Leadville, SF5.0 DMP Environment , no PowerPath There is no need to deal with a (from Symantec’s point of view) 3rd-party multipathing layer
explicitly, no interference from different multipathing layers.
Nevertheless, some hints from the PowerPath configuration are helpful as well. For example,
use vxconfigd -k instead of vxdctl enable, at least in deconfiguration situations.. You should
also use osn namingscheme in deconfiguration environments; problems have been detected
with ebn namingscheme. And use”persistence=no” namingscheme, as in the Powerpath
configuration.
I don’t know if stopping the eventsource daemon is really necessary, but it shouldn’t do any
harm. If you need it, re-enable it after finishing the reconfiguration.
deconfigure script #! /bin/bash # # pre-remove commands # =================== # # stop eventsource daemon, if it is running vxddladm stop eventsource # determine all Veritas disks which are currently not imported, VXDISKS=`vxdisk -e list | awk '{print $1 " (" $4 ") " $6}' | \ grep "(-)" | awk '{ print $1}' ` # set these disks offline (workaround; see above) for i in $VXDISKS do vxdisk offline $i done # remove these disks from the Veritas configuration for i in $VXDISKS do vxdisk rm $i done
Now, reconfigure the array, then run the configure script.
configure script #! /bin/bash # # post-reconfiguration commands # ============================= # # rescan Solaris, remove device nodes which disappeared cfgadm -al -o show_FCP_dev >/dev/null
EMC Proven Professional Knowledge Sharing 2008 21
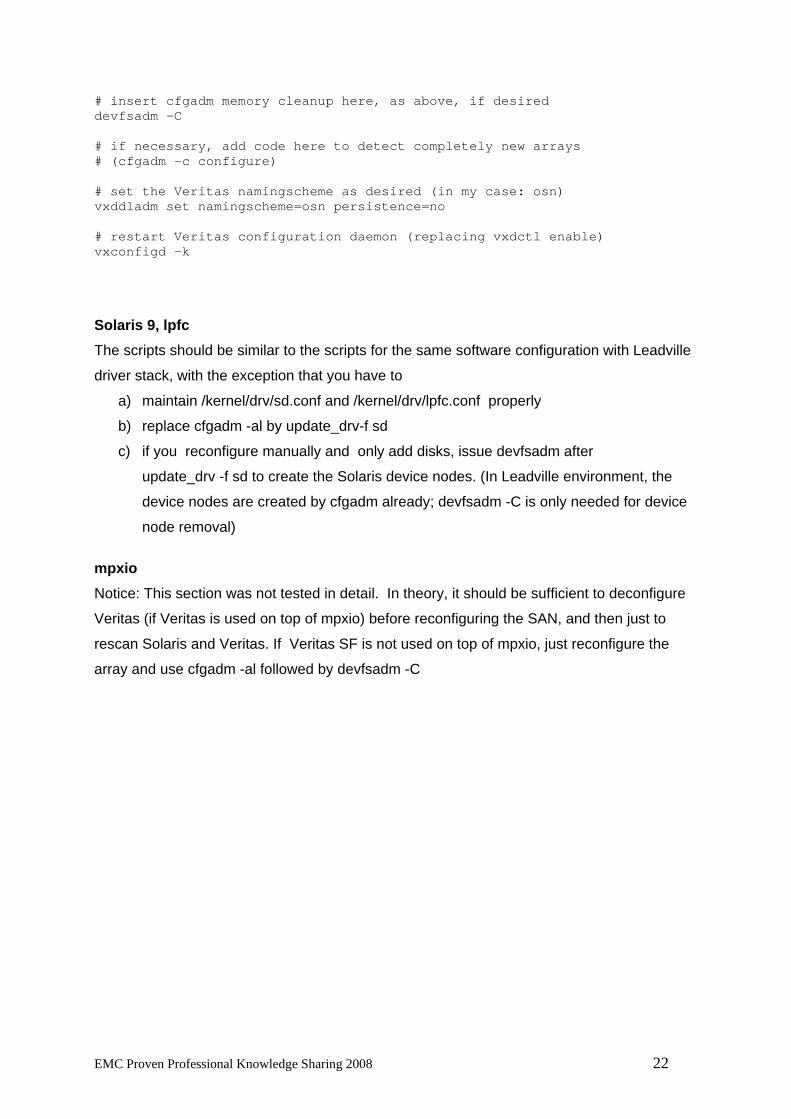
# insert cfgadm memory cleanup here, as above, if desired devfsadm -C # if necessary, add code here to detect completely new arrays # (cfgadm -c configure) # set the Veritas namingscheme as desired (in my case: osn) vxddladm set namingscheme=osn persistence=no # restart Veritas configuration daemon (replacing vxdctl enable) vxconfigd -k
Solaris 9, lpfc The scripts should be similar to the scripts for the same software configuration with Leadville
driver stack, with the exception that you have to
a) maintain /kernel/drv/sd.conf and /kernel/drv/lpfc.conf properly
b) replace cfgadm -al by update_drv-f sd
c) if you reconfigure manually and only add disks, issue devfsadm after
update_drv -f sd to create the Solaris device nodes. (In Leadville environment, the
device nodes are created by cfgadm already; devfsadm -C is only needed for device
node removal)
mpxio Notice: This section was not tested in detail. In theory, it should be sufficient to deconfigure
Veritas (if Veritas is used on top of mpxio) before reconfiguring the SAN, and then just to
rescan Solaris and Veritas. If Veritas SF is not used on top of mpxio, just reconfigure the
array and use cfgadm -al followed by devfsadm -C
EMC Proven Professional Knowledge Sharing 2008 22
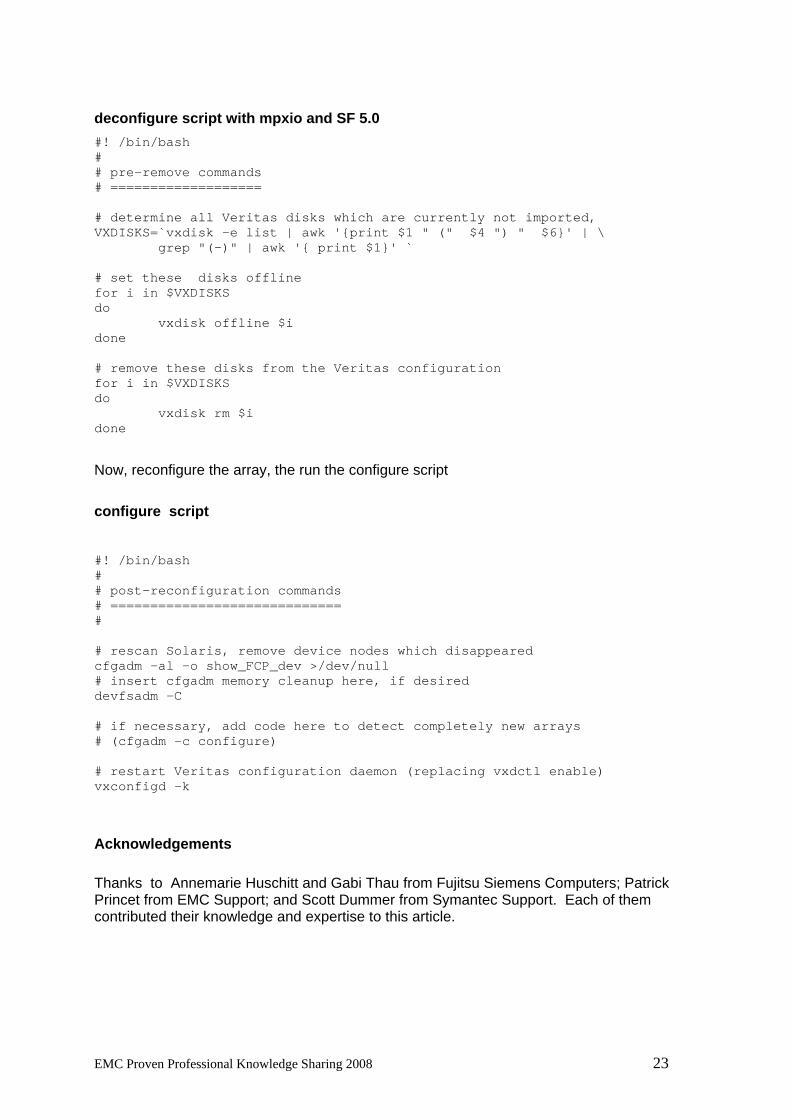
deconfigure script with mpxio and SF 5.0 #! /bin/bash # # pre-remove commands # =================== # determine all Veritas disks which are currently not imported, VXDISKS=`vxdisk -e list | awk '{print $1 " (" $4 ") " $6}' | \ grep "(-)" | awk '{ print $1}' ` # set these disks offline for i in $VXDISKS do vxdisk offline $i done # remove these disks from the Veritas configuration for i in $VXDISKS do vxdisk rm $i done
Now, reconfigure the array, the run the configure script
configure script #! /bin/bash # # post-reconfiguration commands # ============================= # # rescan Solaris, remove device nodes which disappeared cfgadm -al -o show_FCP_dev >/dev/null # insert cfgadm memory cleanup here, if desired devfsadm -C # if necessary, add code here to detect completely new arrays # (cfgadm -c configure) # restart Veritas configuration daemon (replacing vxdctl enable) vxconfigd -k
Acknowledgements Thanks to Annemarie Huschitt and Gabi Thau from Fujitsu Siemens Computers; Patrick Princet from EMC Support; and Scott Dummer from Symantec Support. Each of them contributed their knowledge and expertise to this article.
EMC Proven Professional Knowledge Sharing 2008 23